Knowledge hub


Open account
Open your Bank al Etihad account using your phone!
Open your account from anywhere!
Open your Bank al Etihad account easily, wherever you are. Download the Bank al Etihad app and follow the simple steps below. Available on the App Store, Google Play, and Huawei AppGallery. Search for “Bank al Etihad” and get started today!
How to open an account
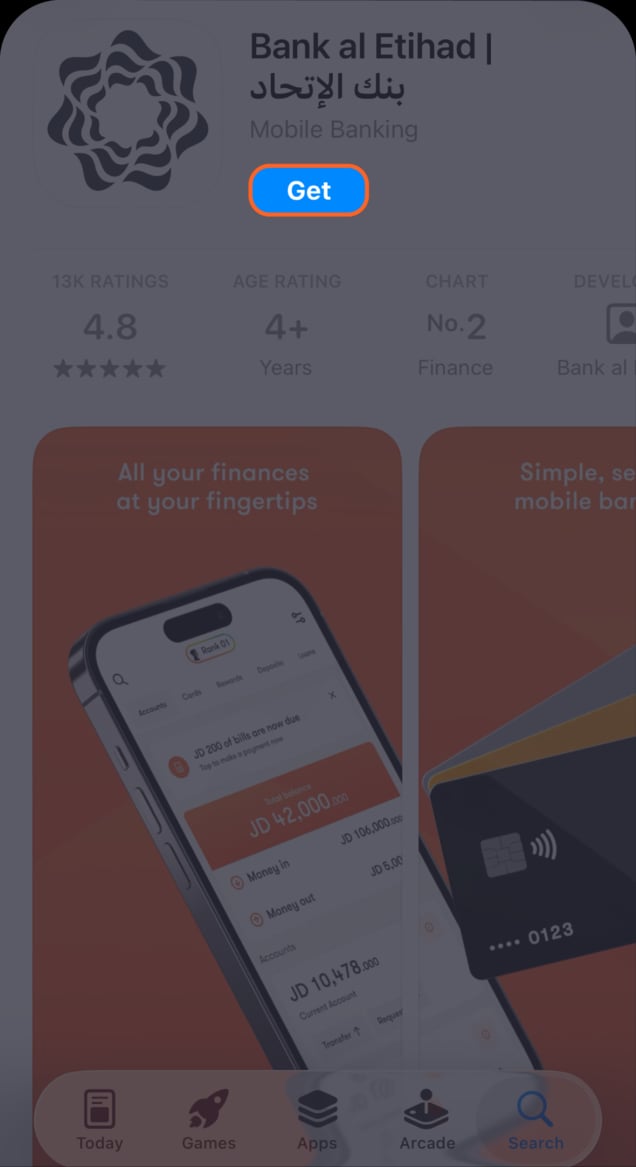
Step 1 of 28
Download the Bank al Etihad app on your phone
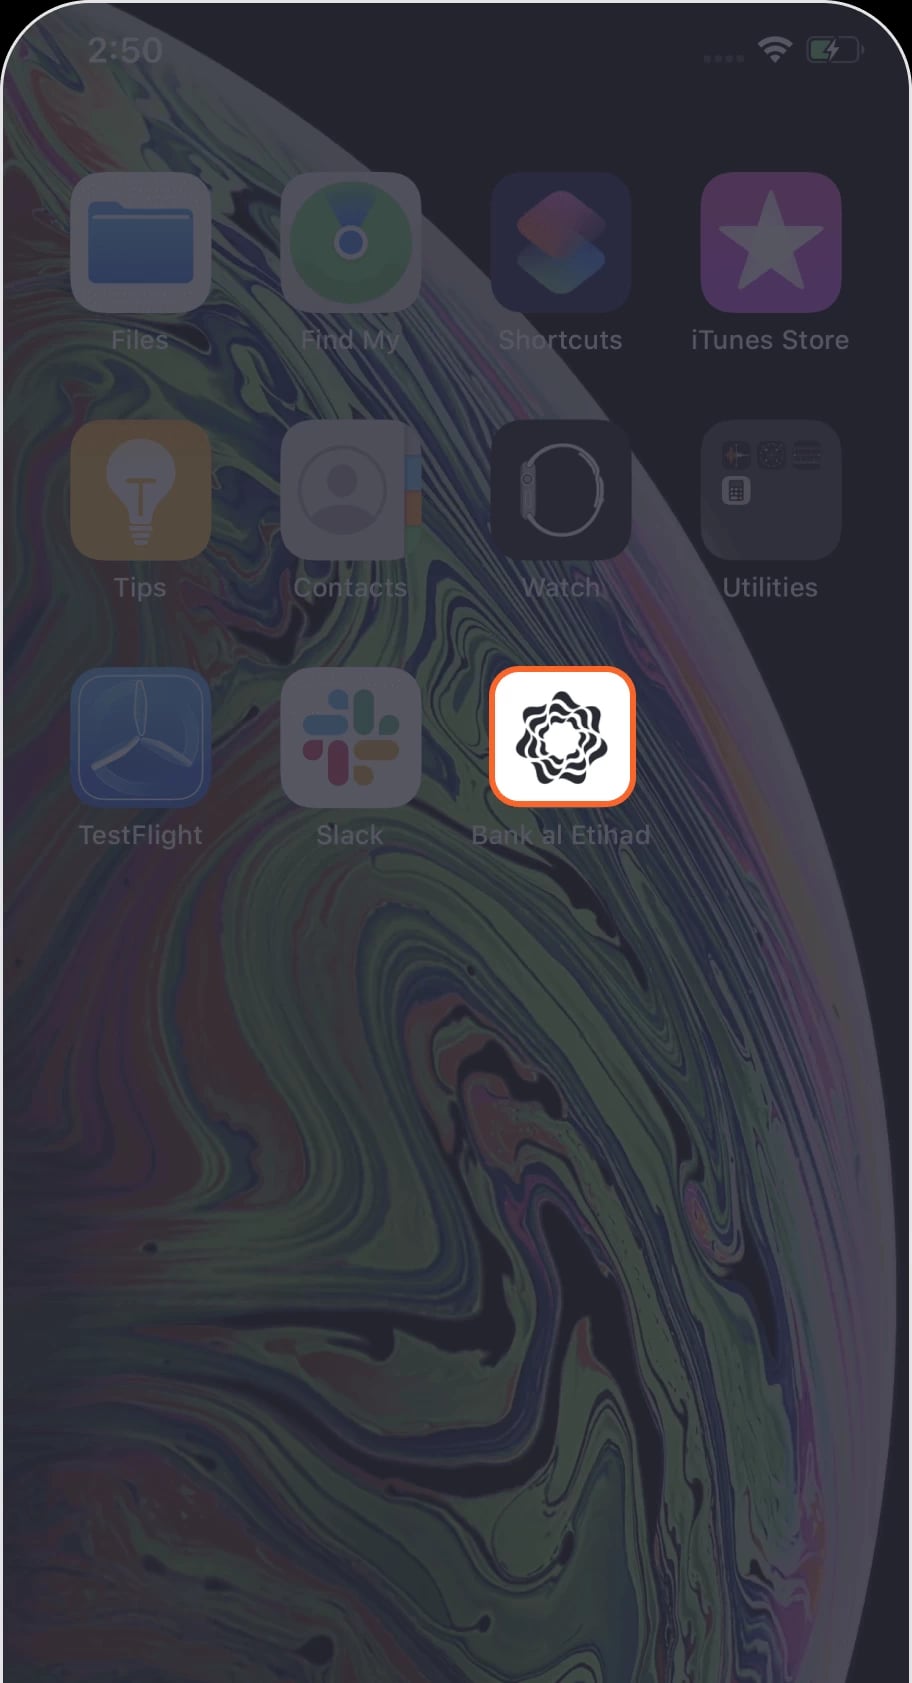
Step 2 of 28
Open the app
You will be directed to the main screen.
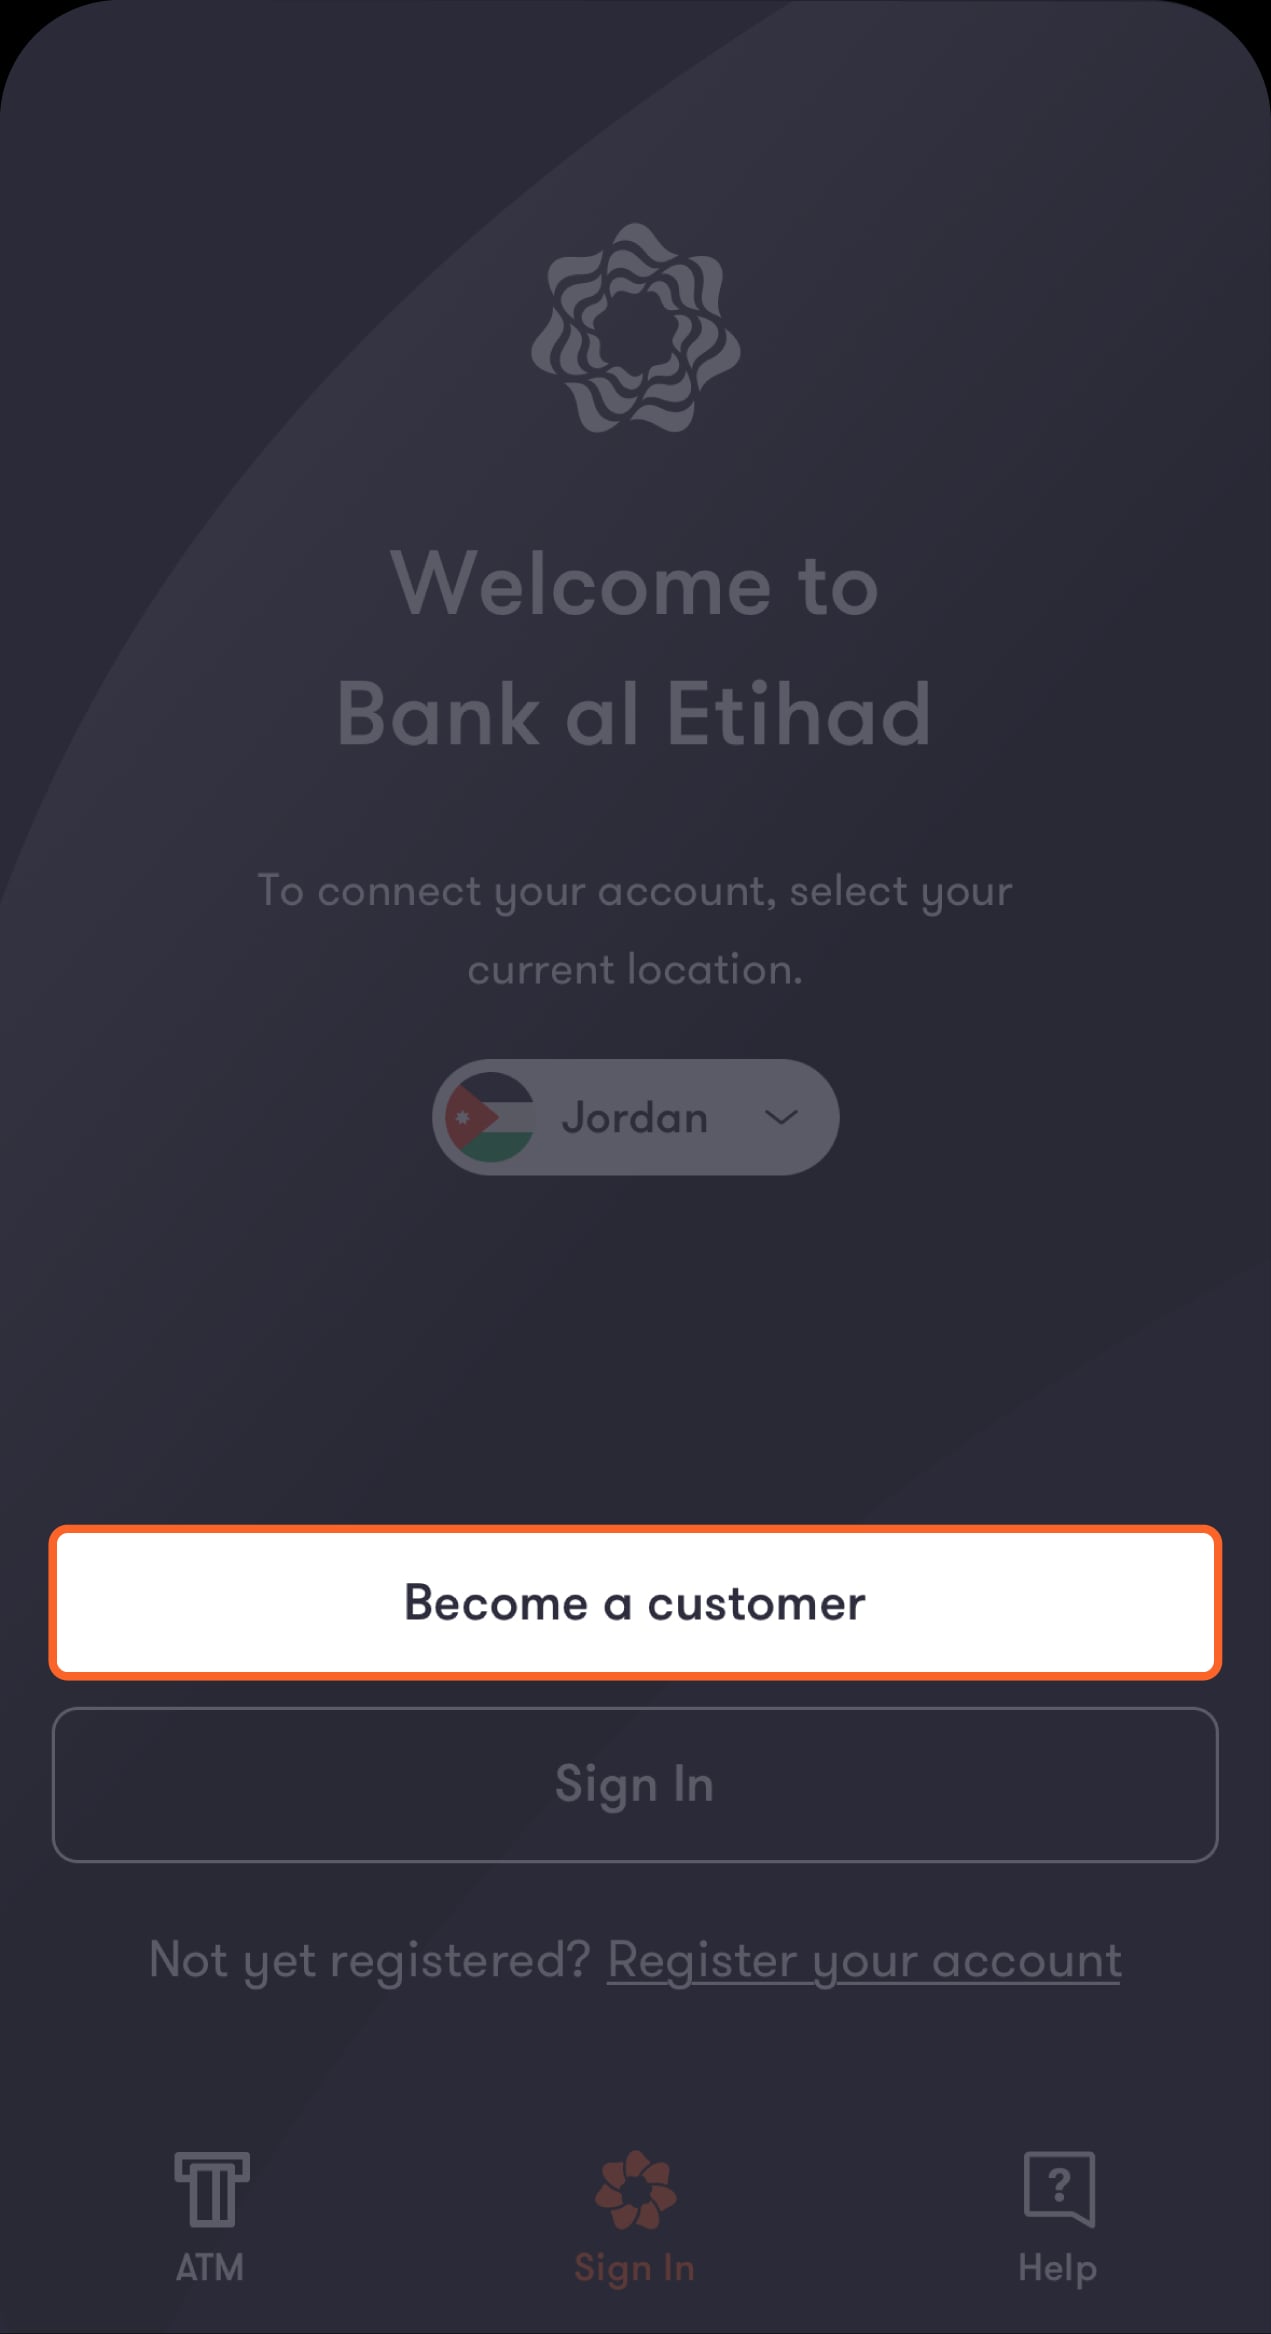
Step 3 of 28
Tap on "Become a customer" from the main screen
This will direct you to choose the type of account you would like to create.
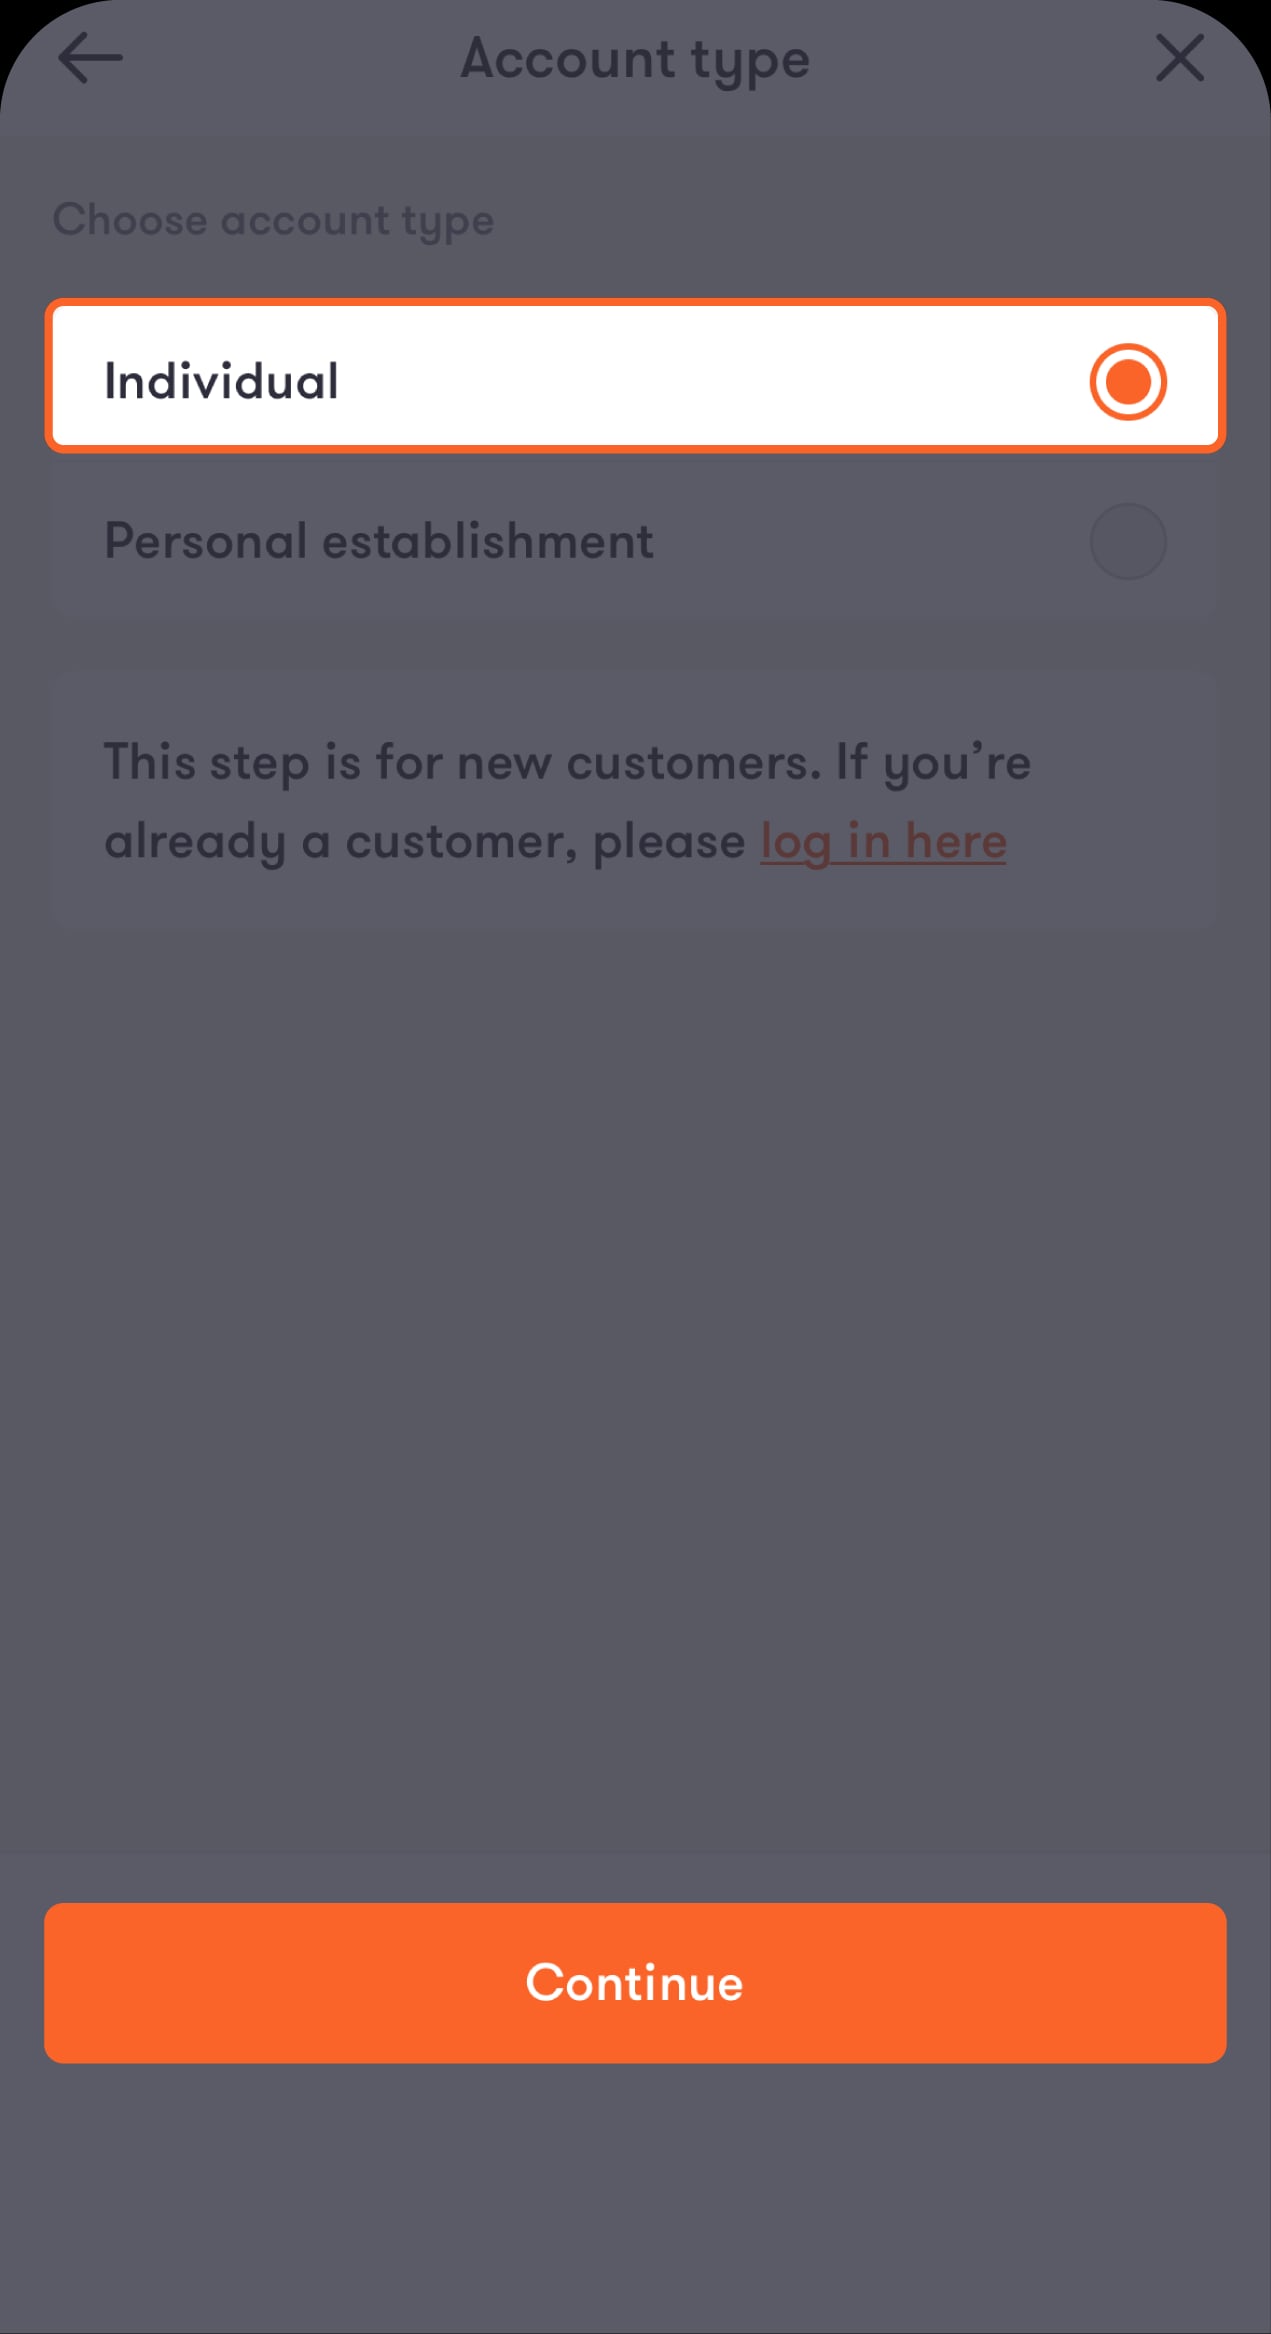
Step 4 of 28
Select the type of account you want to create
Choose “Individual,” then tap “Continue.” You will be directed to start the account opening process, and answer a few personal questions.
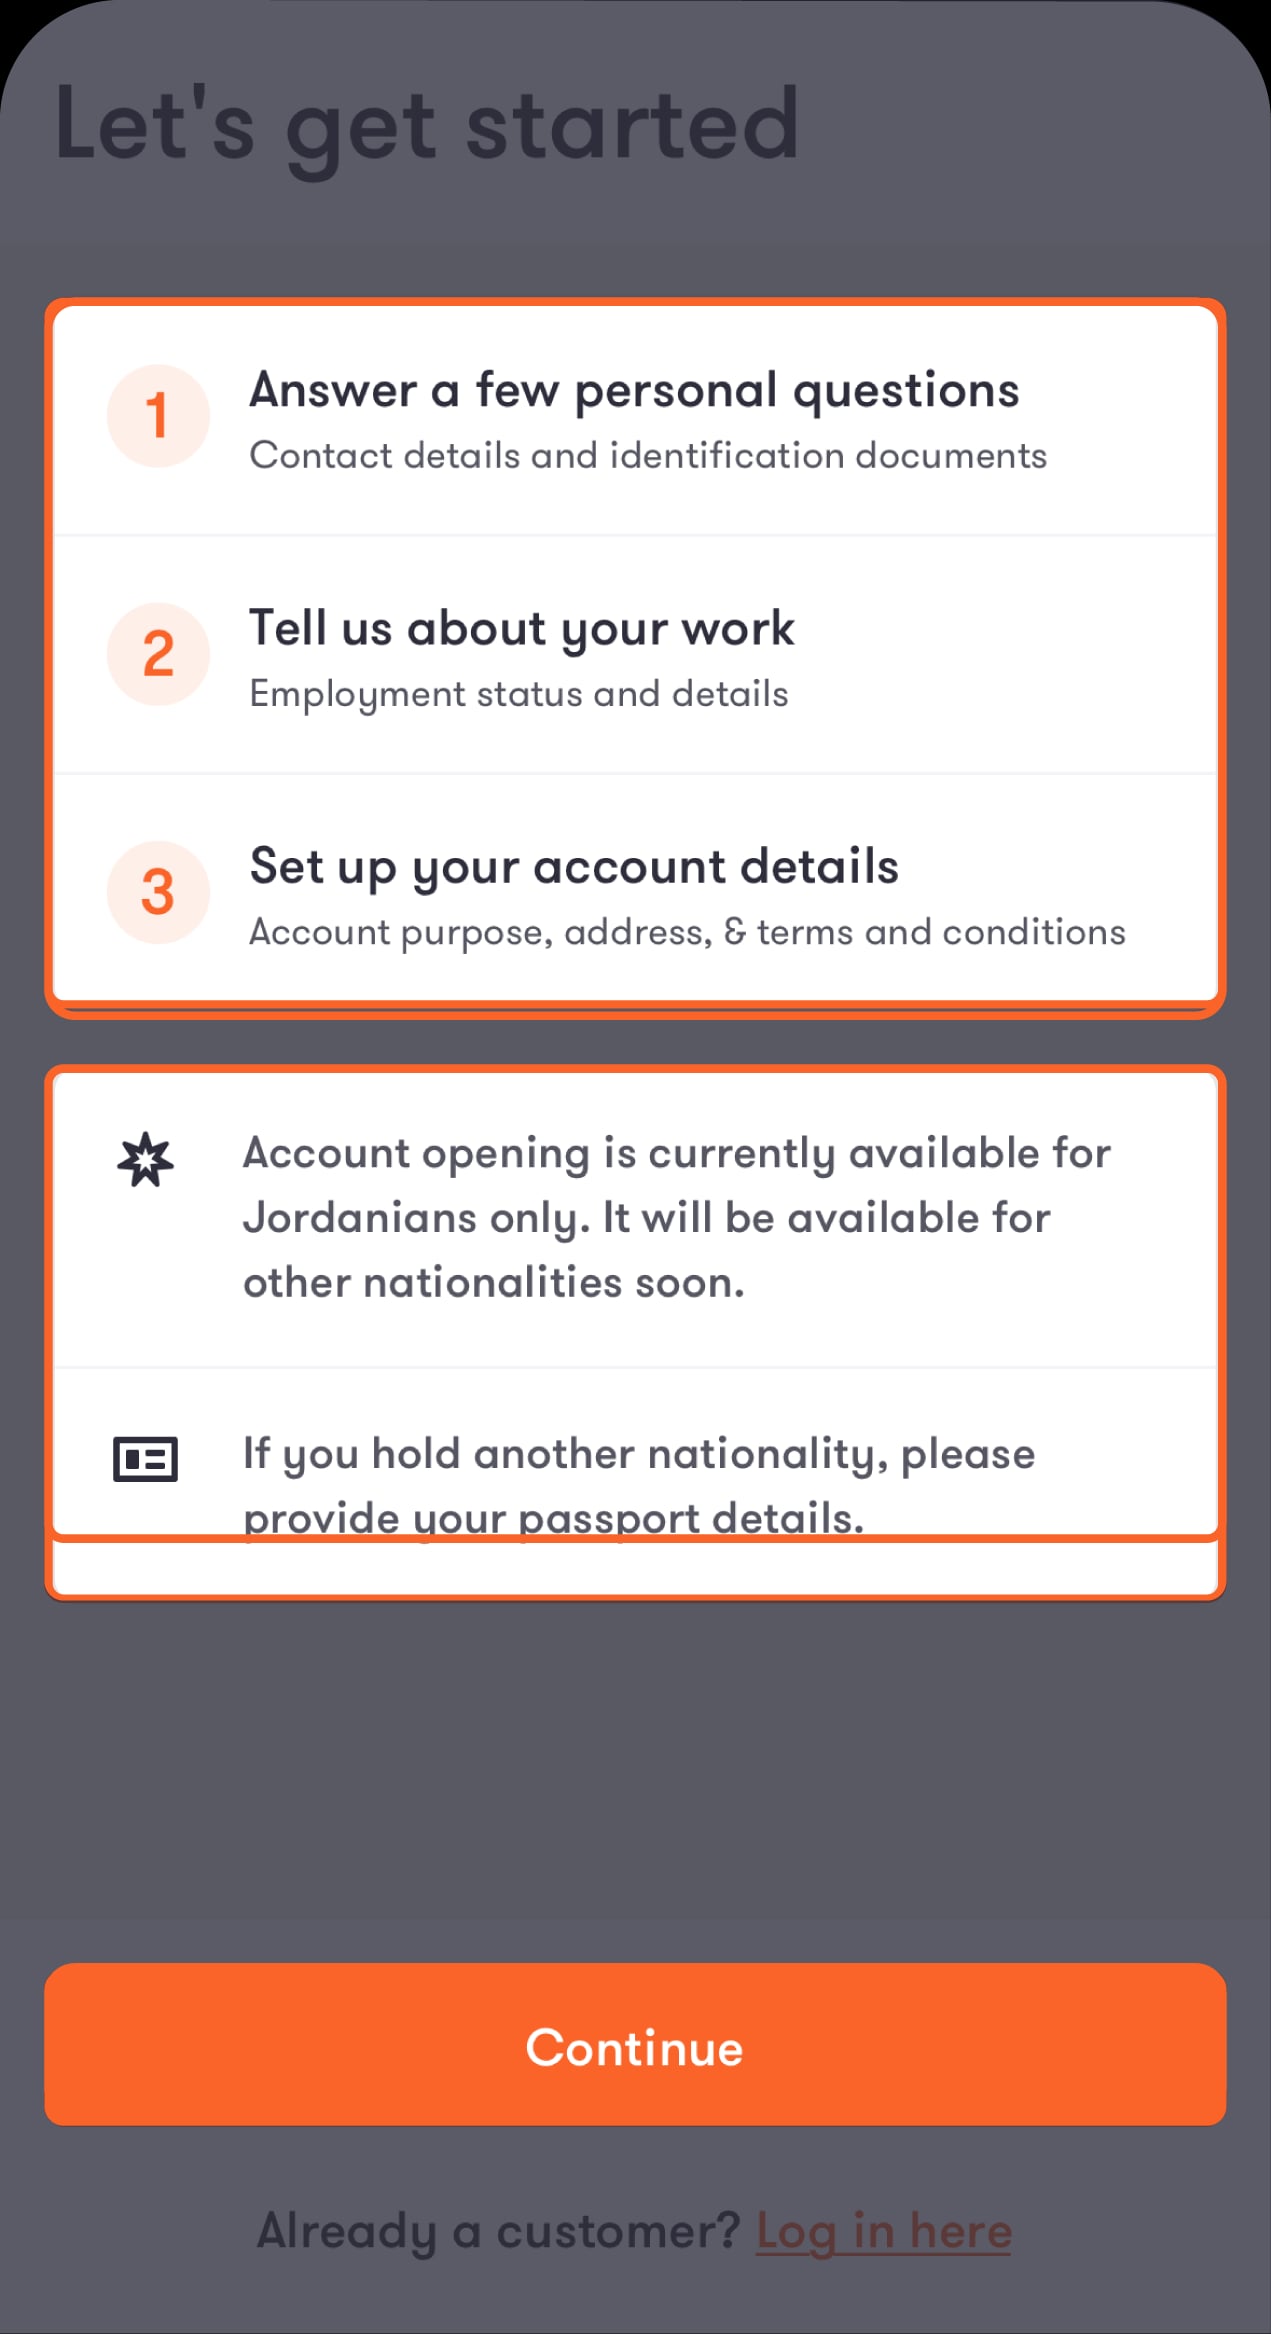
Step 5 of 28
Take a look at the account opening steps
Tap “Continue” to proceed. You will be directed to fill in your contact information.
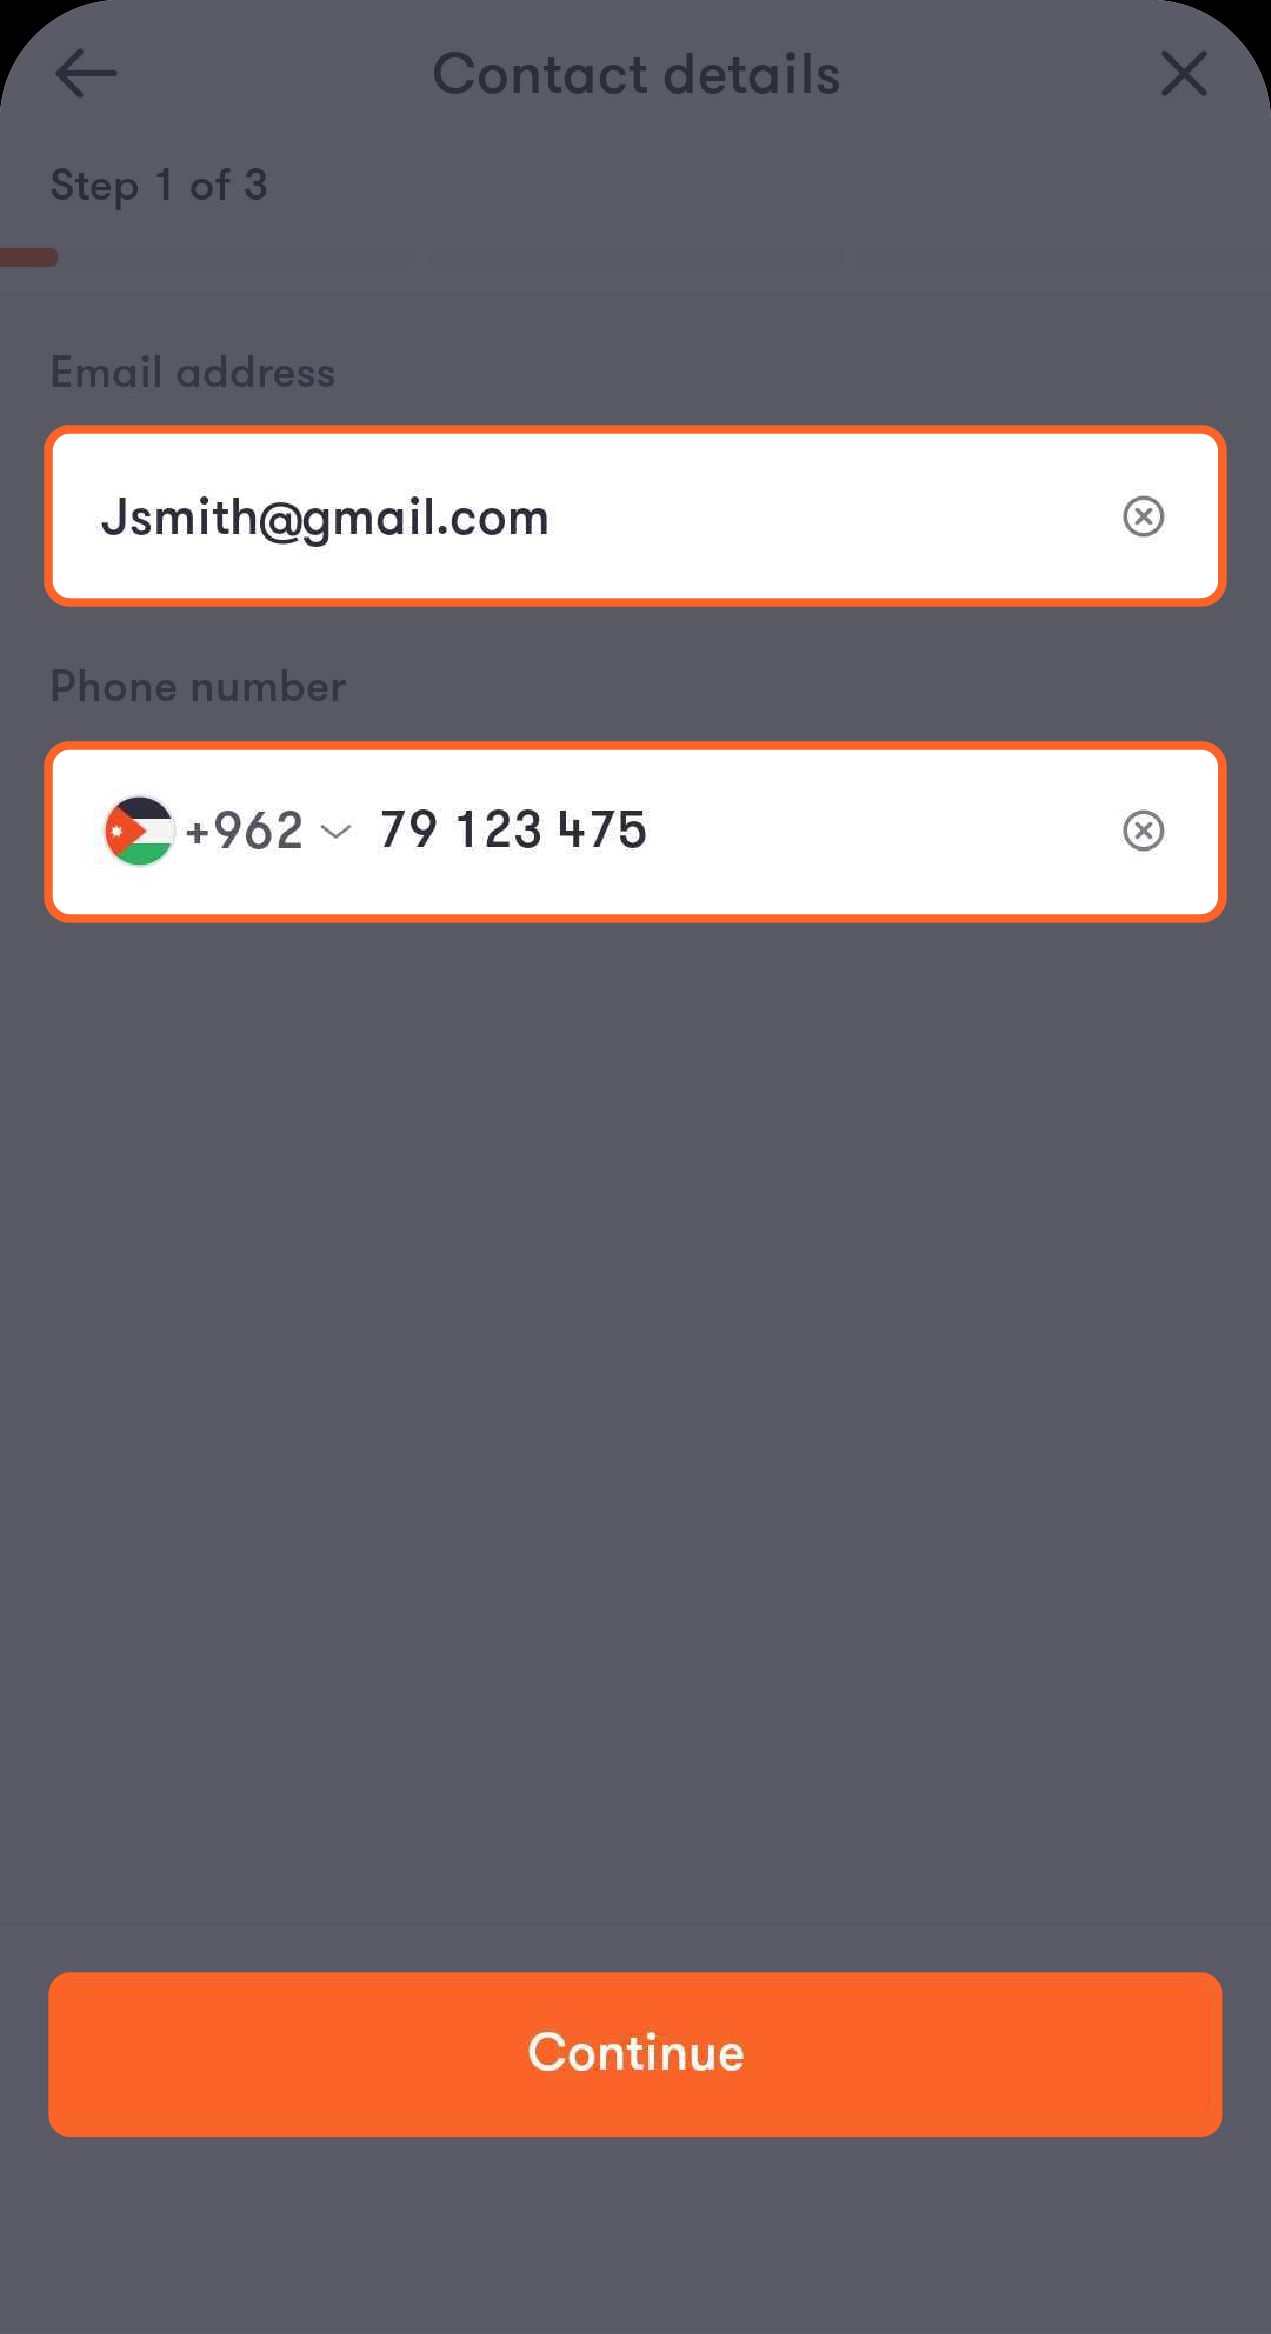
Step 6 of 28
Enter your contact details
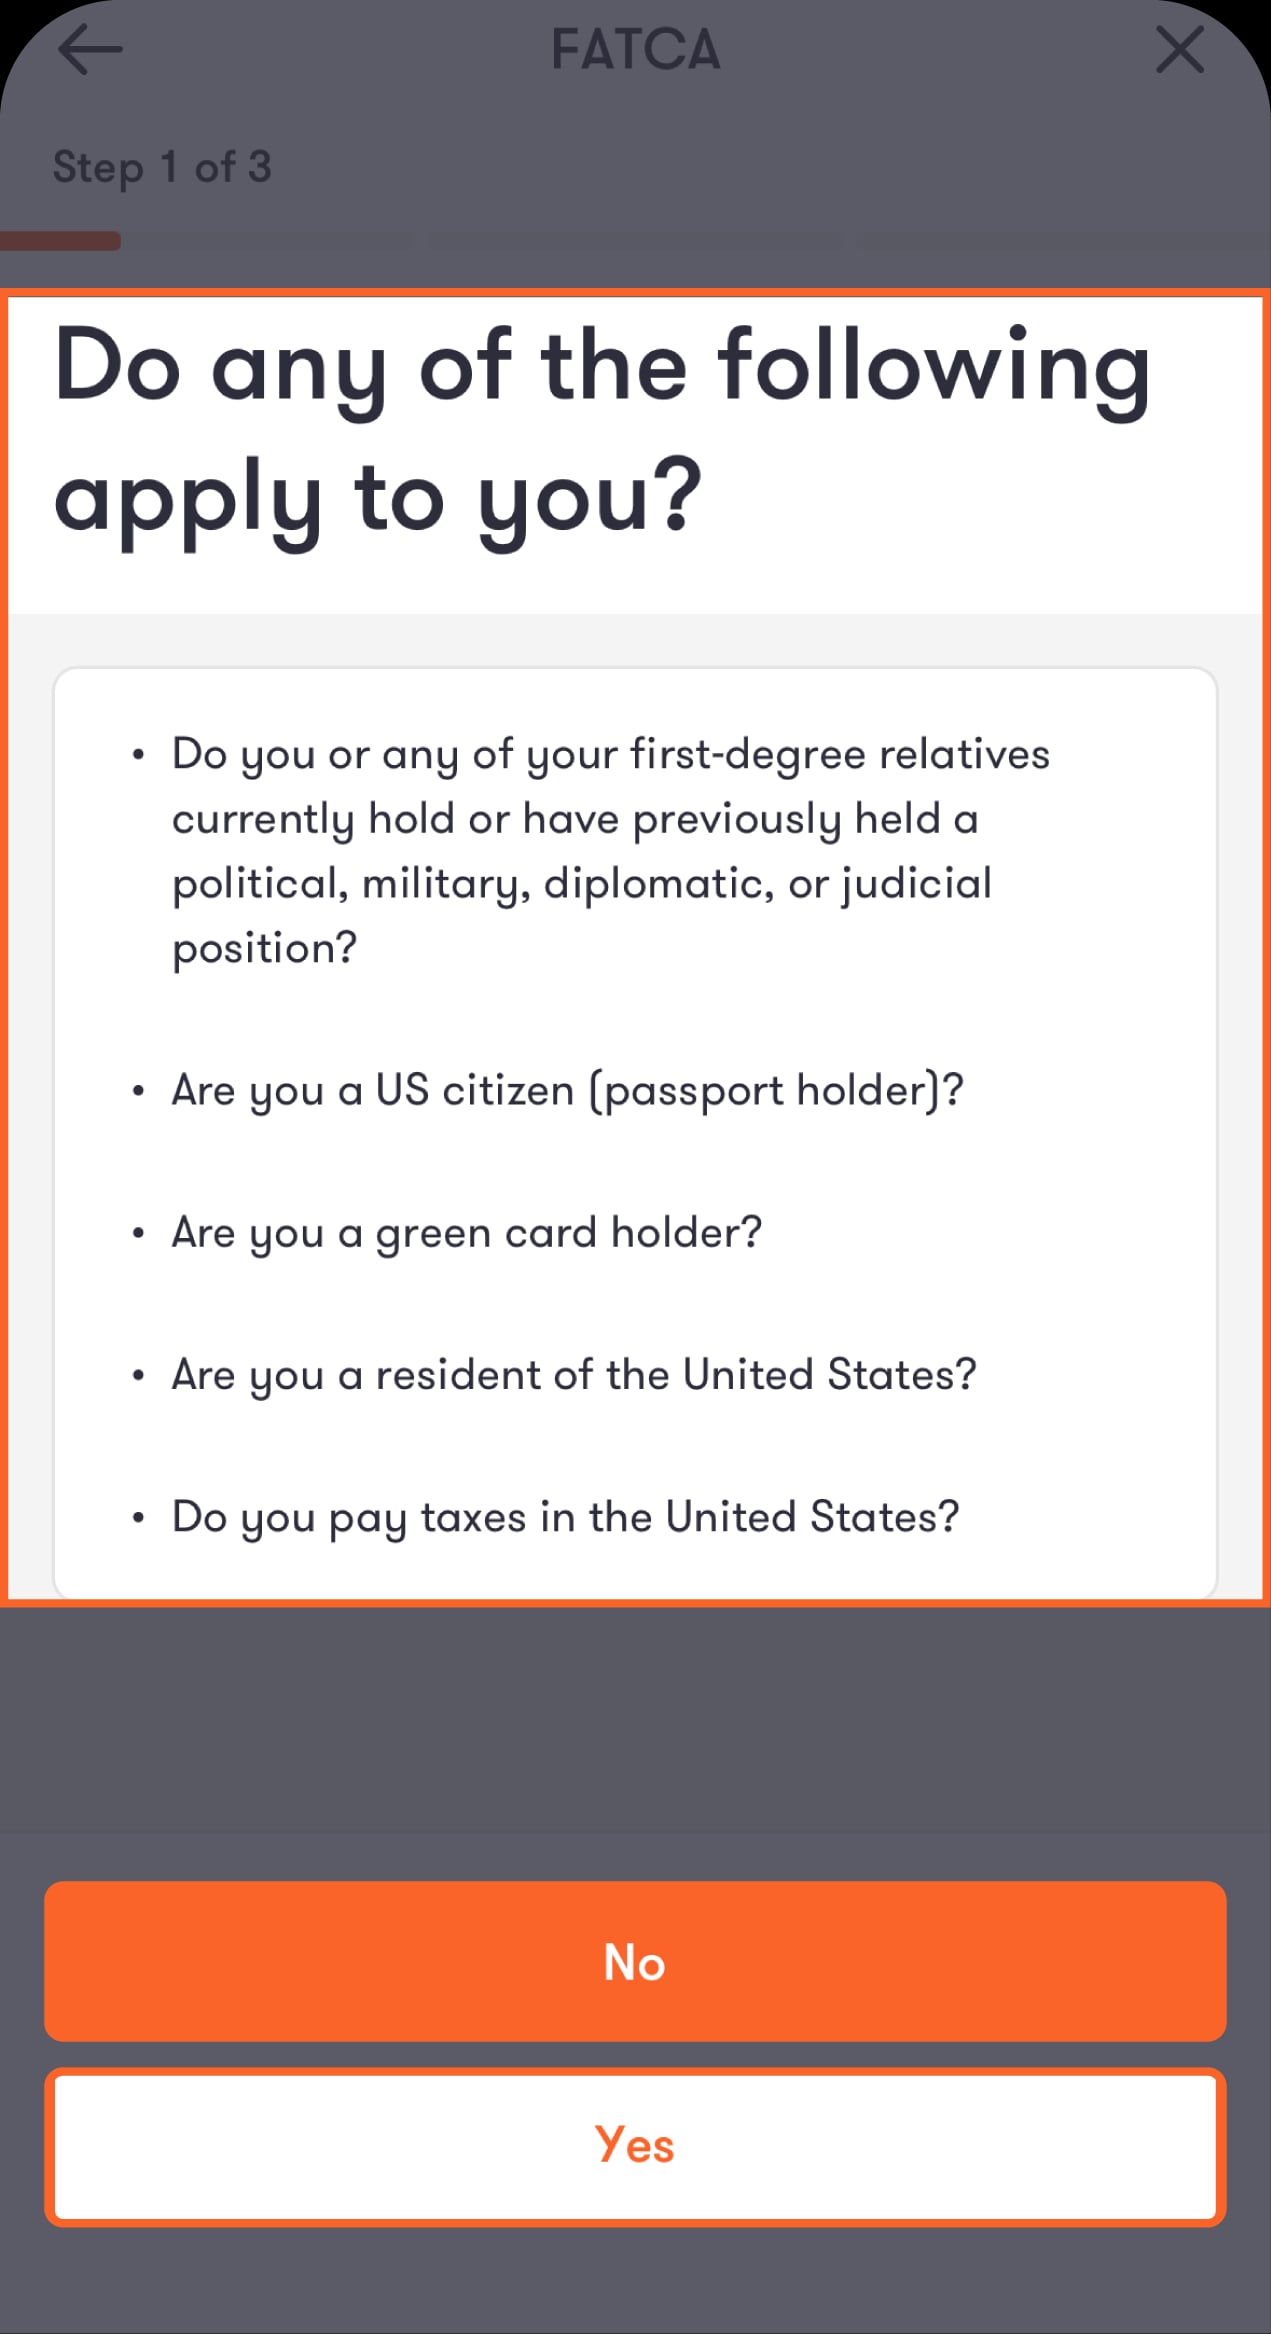
Provide your email address and phone number, then tap “Continue” at the bottom of the screen. You will be directed to answer a few questions.
Step 7 of 28
Answer the questions by selecting “Yes” or “No” at the bottom of the screen
Then, tap “Continue” to proceed to scanning your ID.
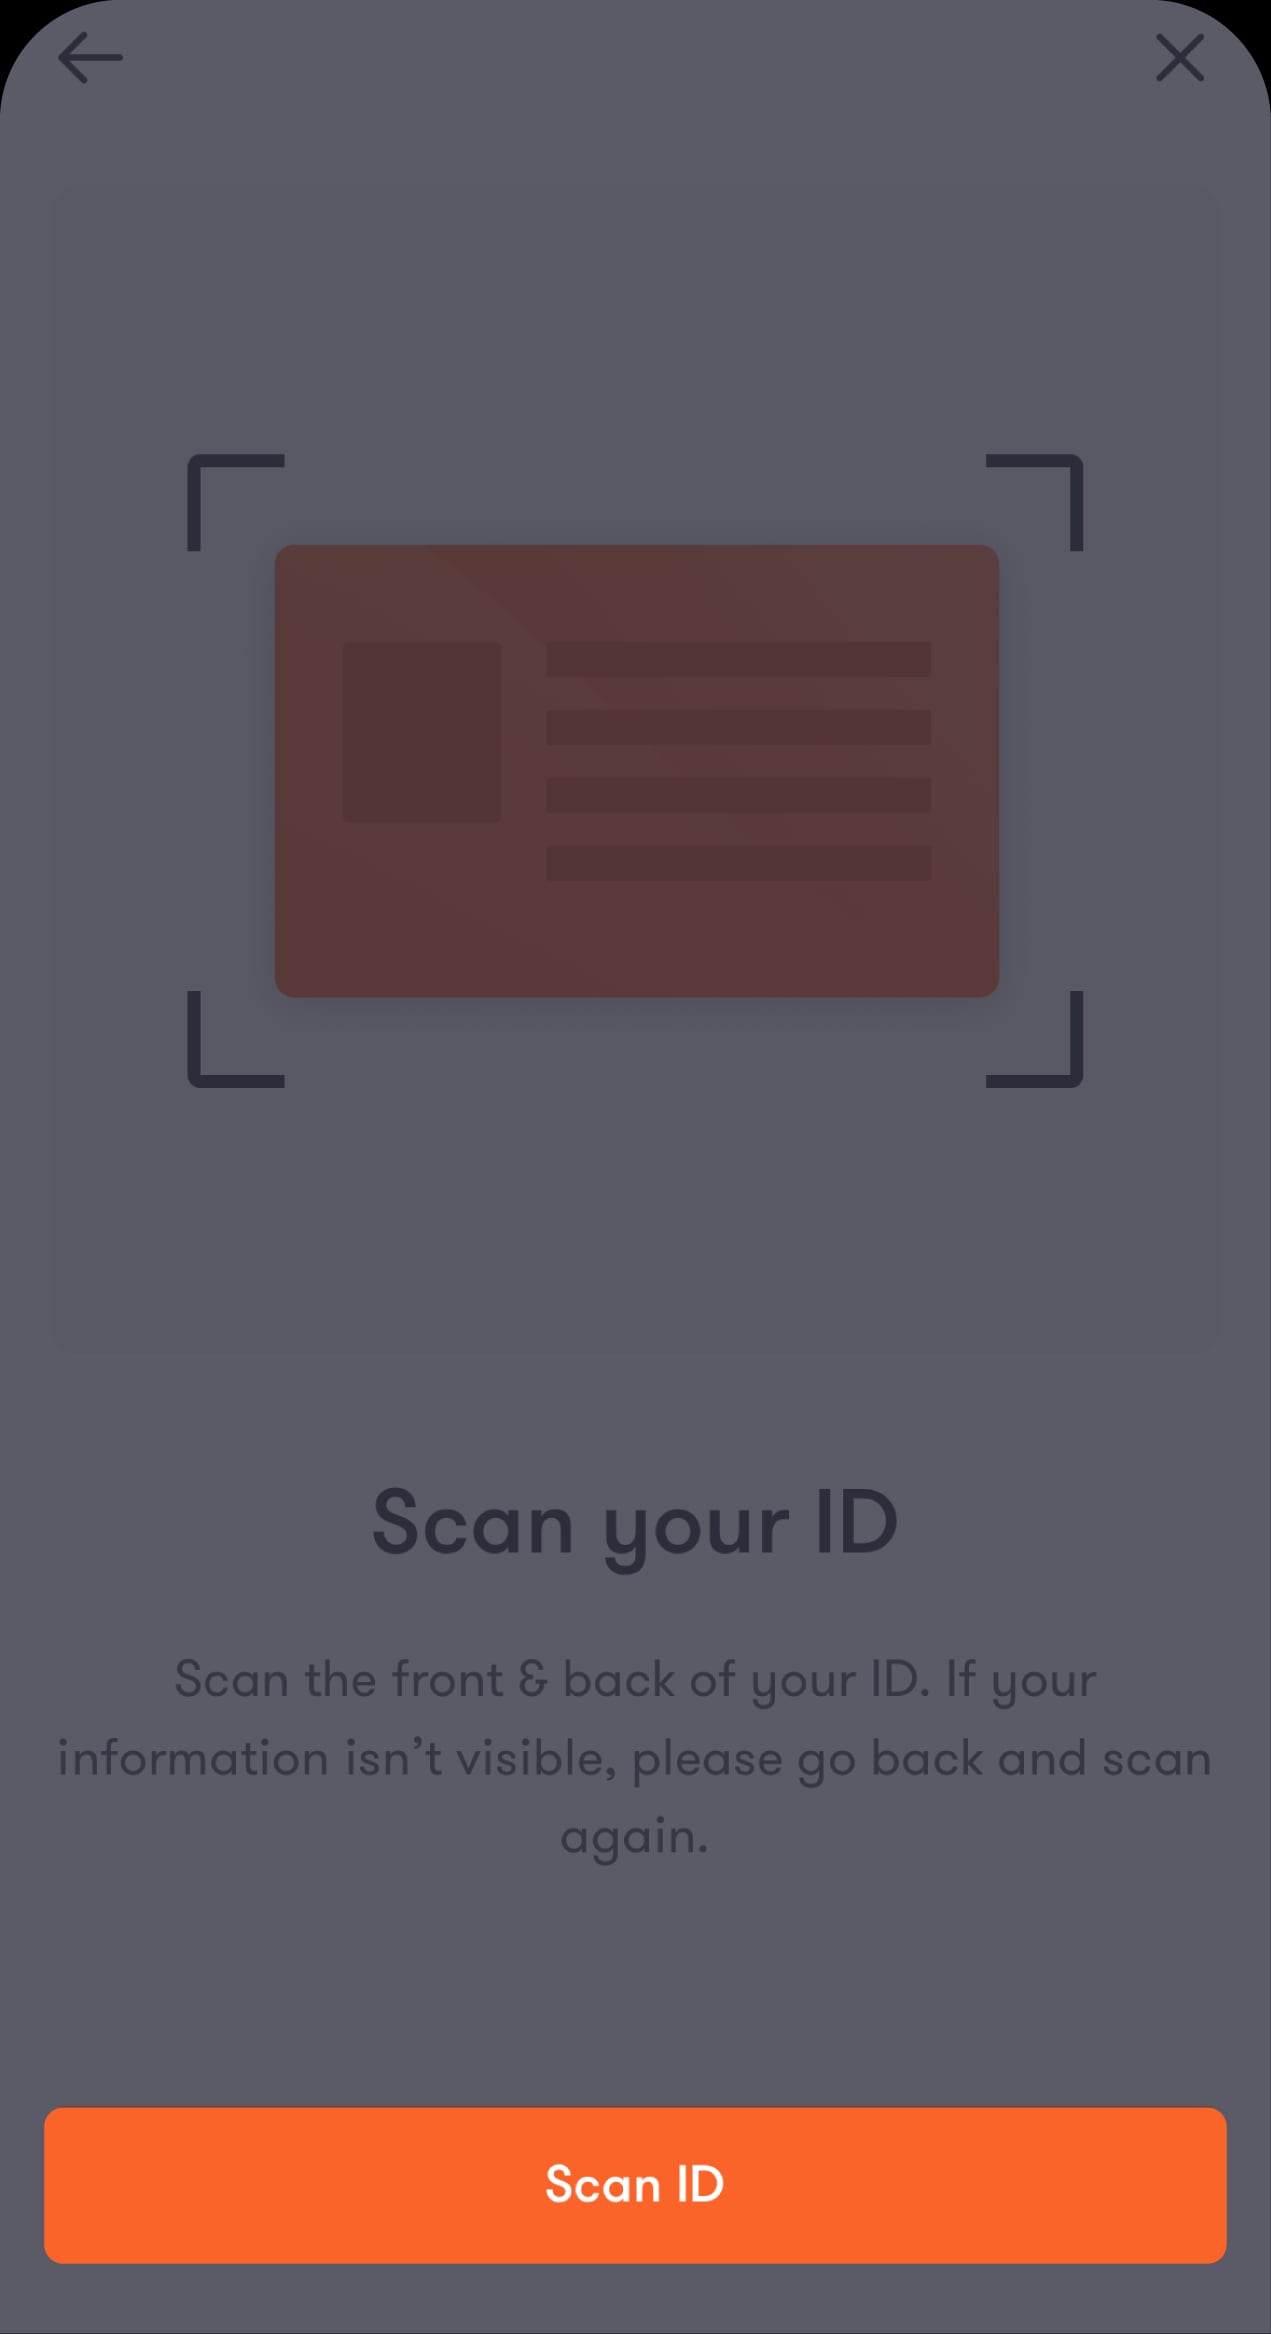
Step 8 of 28
Tap “Scan ID”
You will be directed to scan the front and back of your ID.
Step 9 of 28
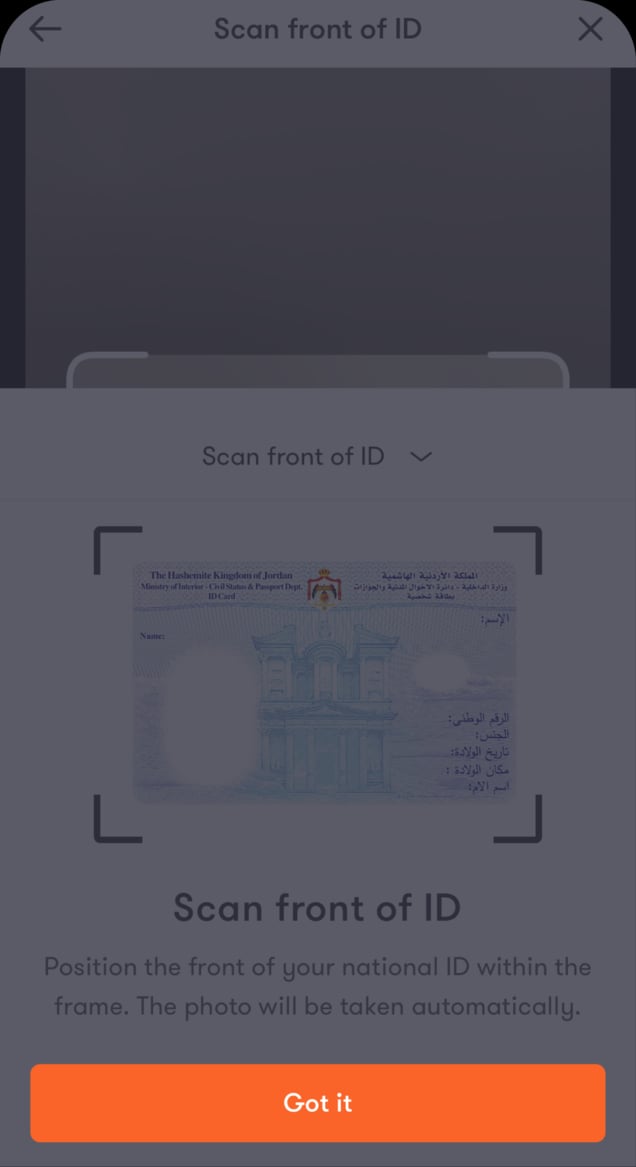
Read the scanning instructions
Then, tap “Got it” to start scanning the front of your ID.
Step 10 of 28
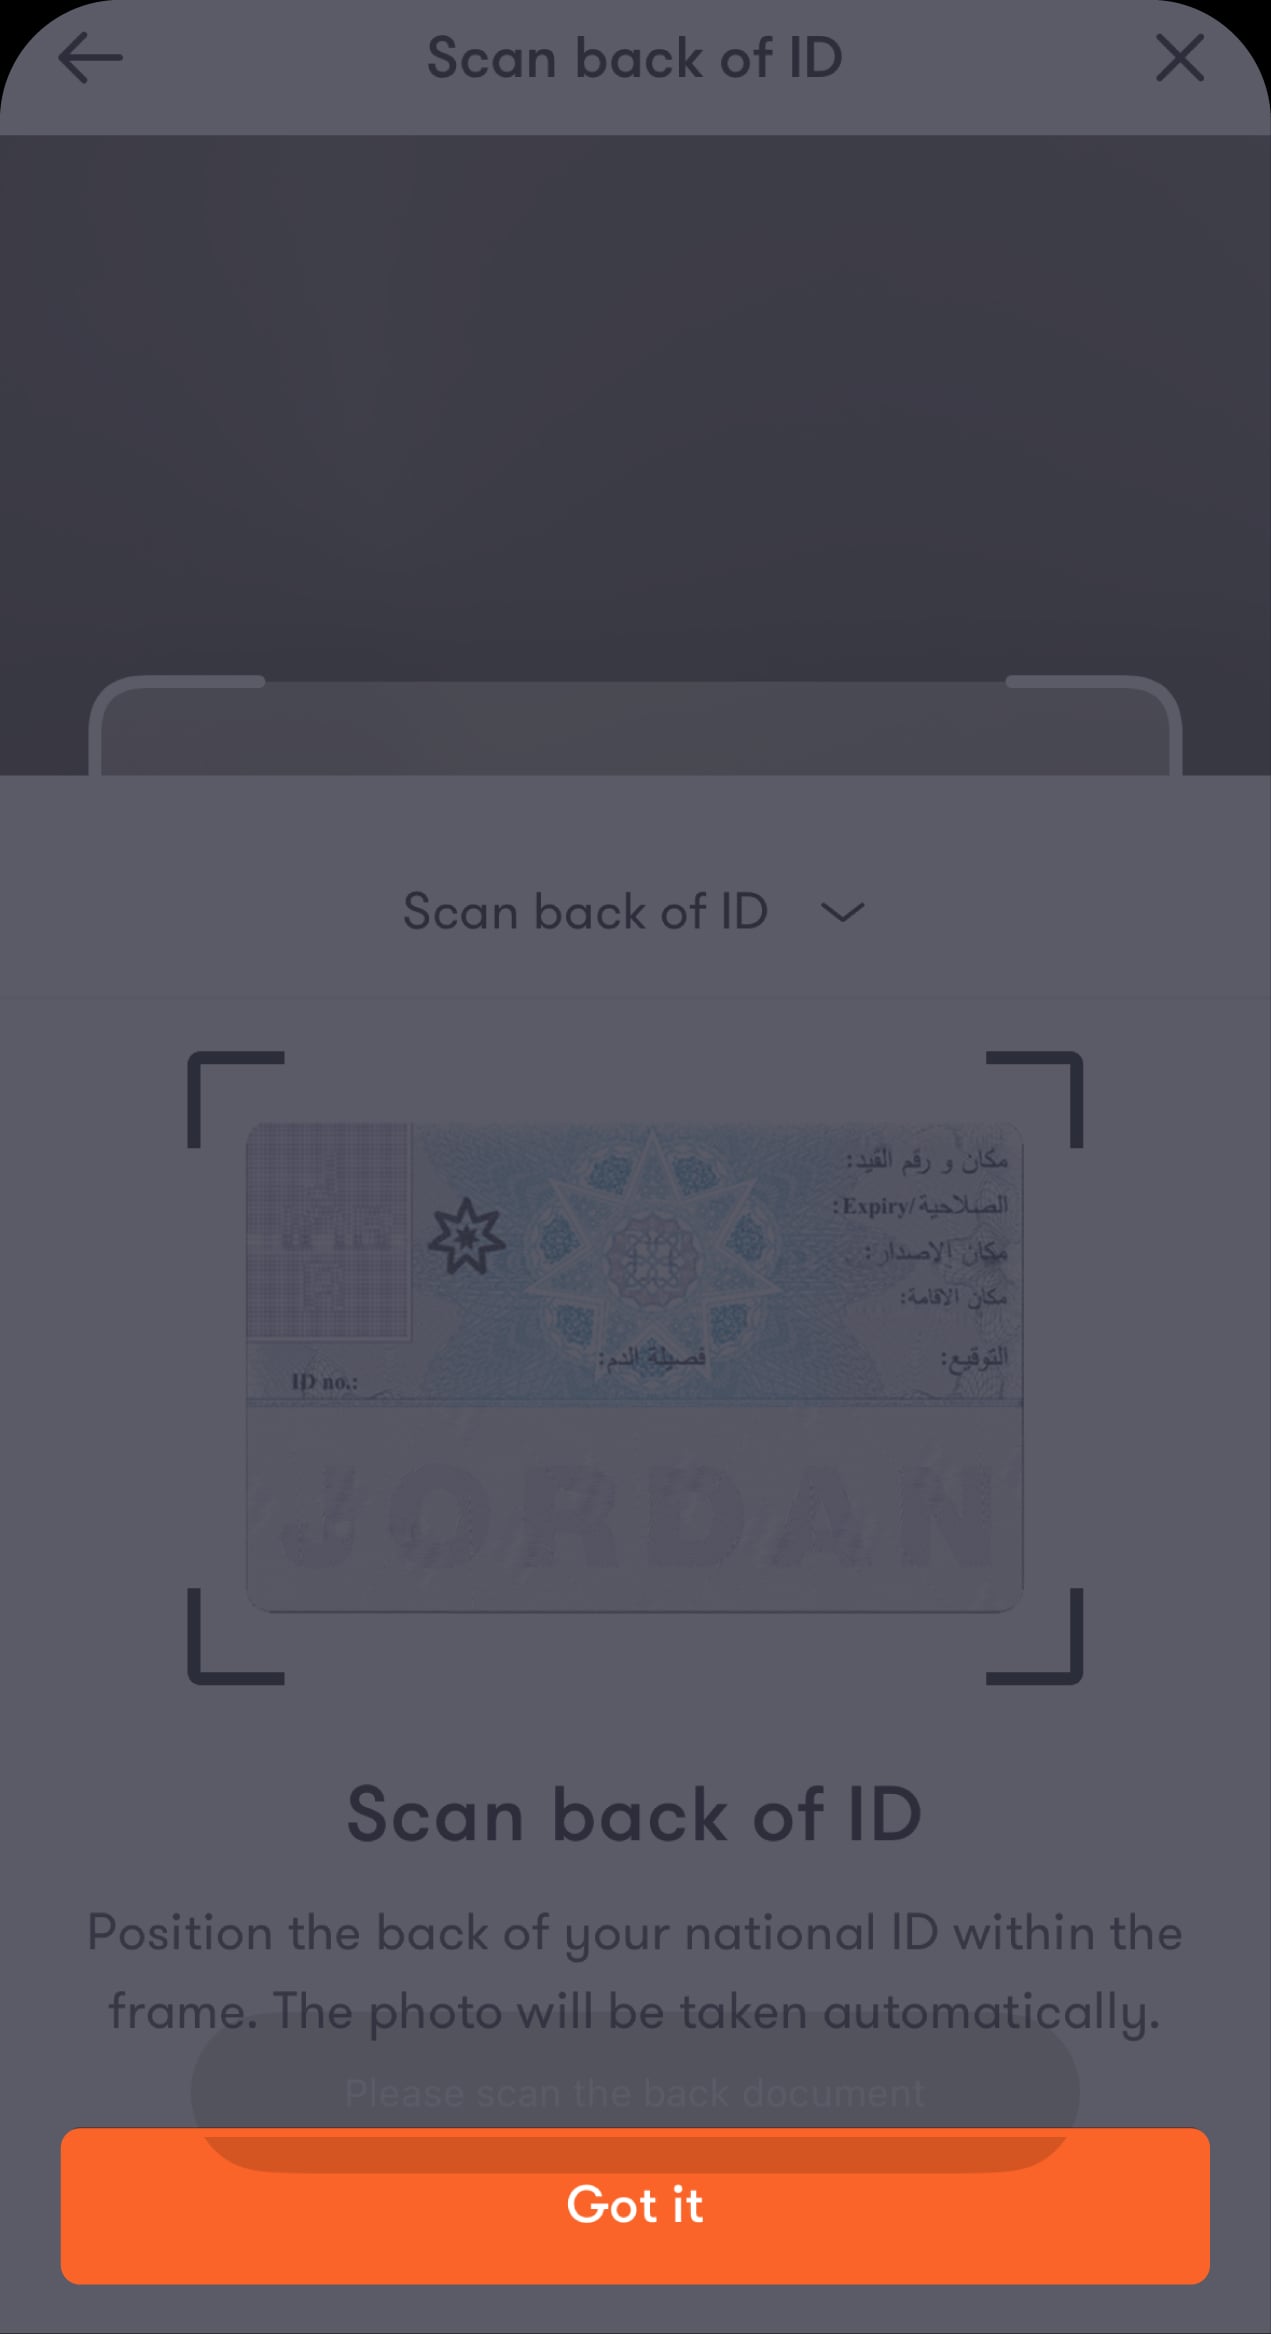
Tap “Got it” to scan the back of your ID
After scanning, you will be directed to confirm the scanned details.
Step 11 of 28
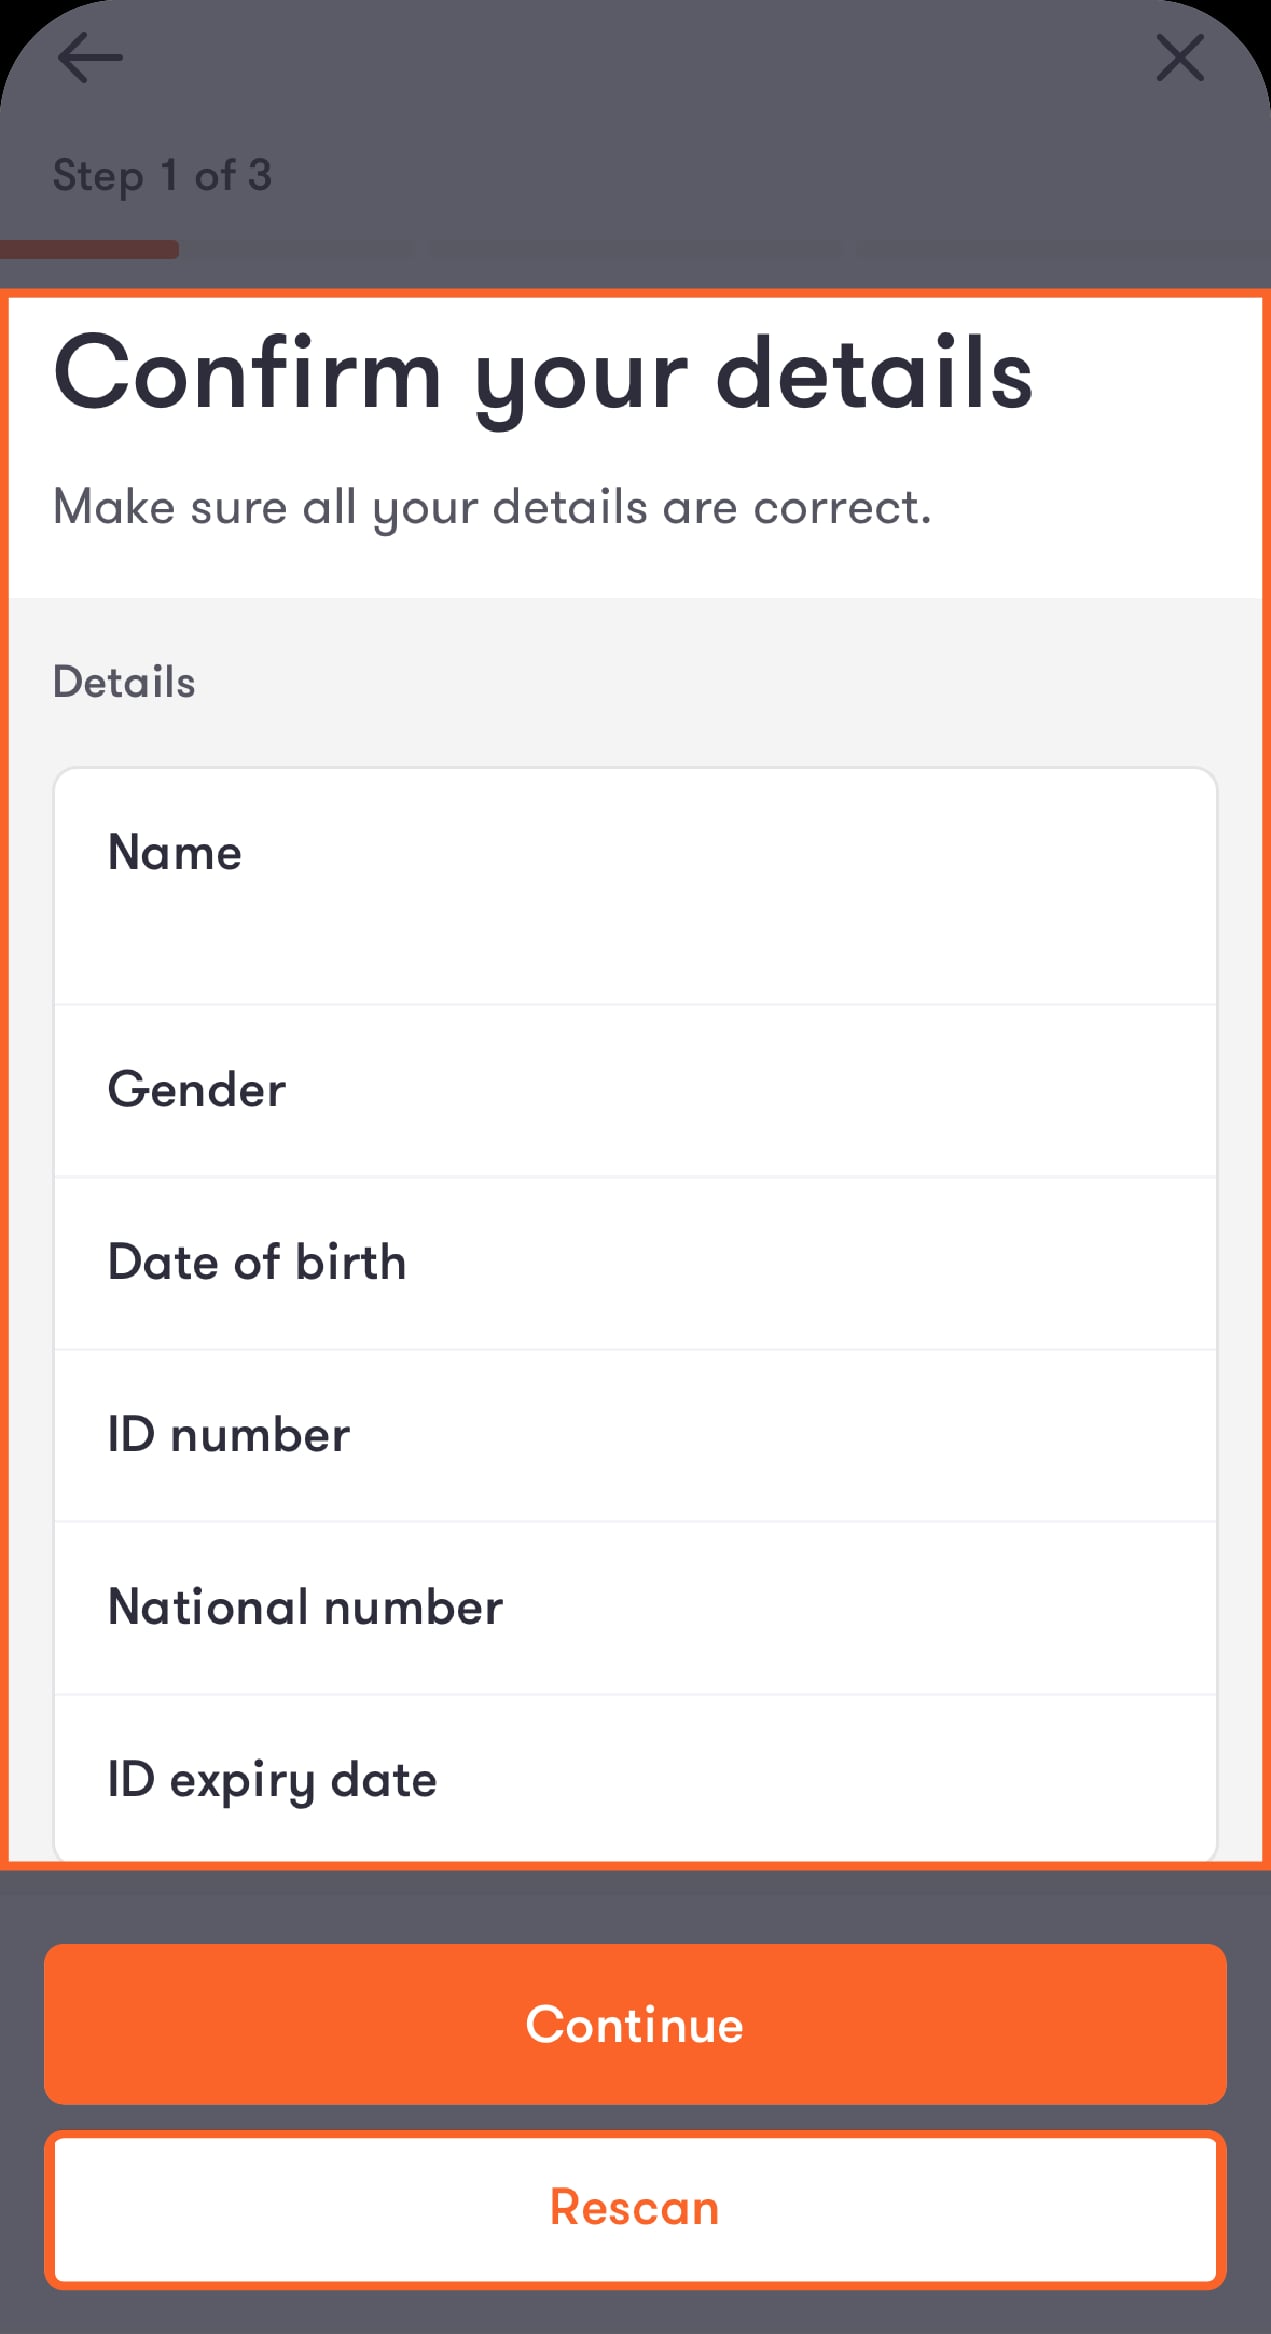
Review your scanned details
Make sure the scanned details are correct, then tap “Continue.” You will be directed to take a selfie.
Step 12 of 28
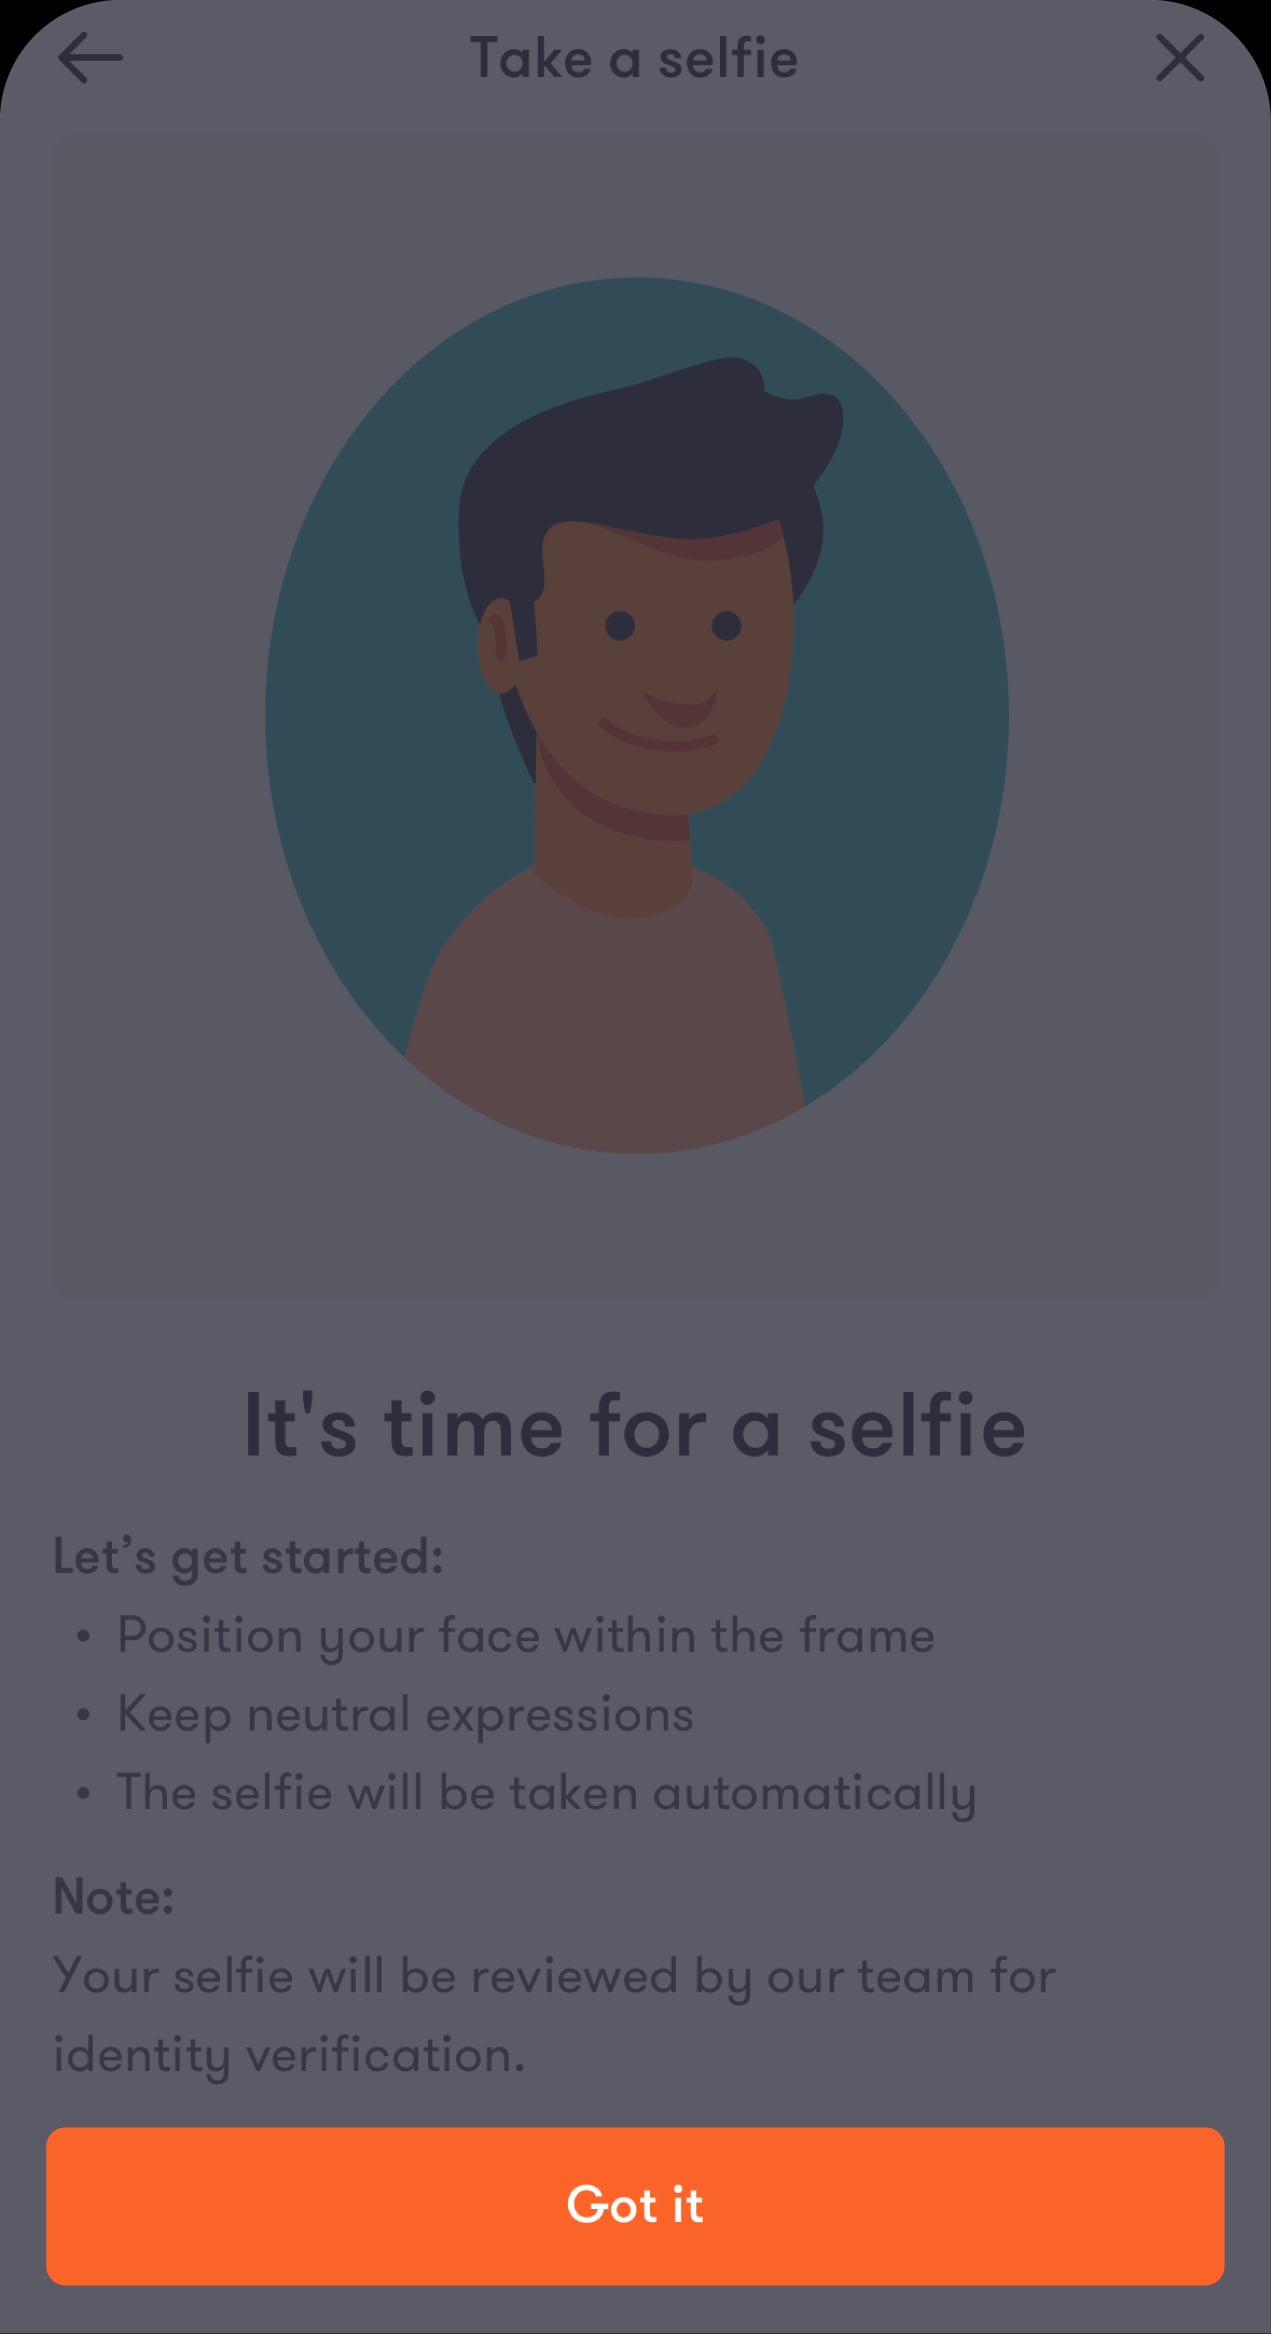
Take a selfie
Tap “Got it” to open the selfie frame. Make sure your face is clearly visible. Your photo will be reviewed by our team for identity verification.
Step 13 of 28
Position your face in the frame and follow the on-screen instructions.
You will then be directed to record a video of yourself.
Step 14 of 28
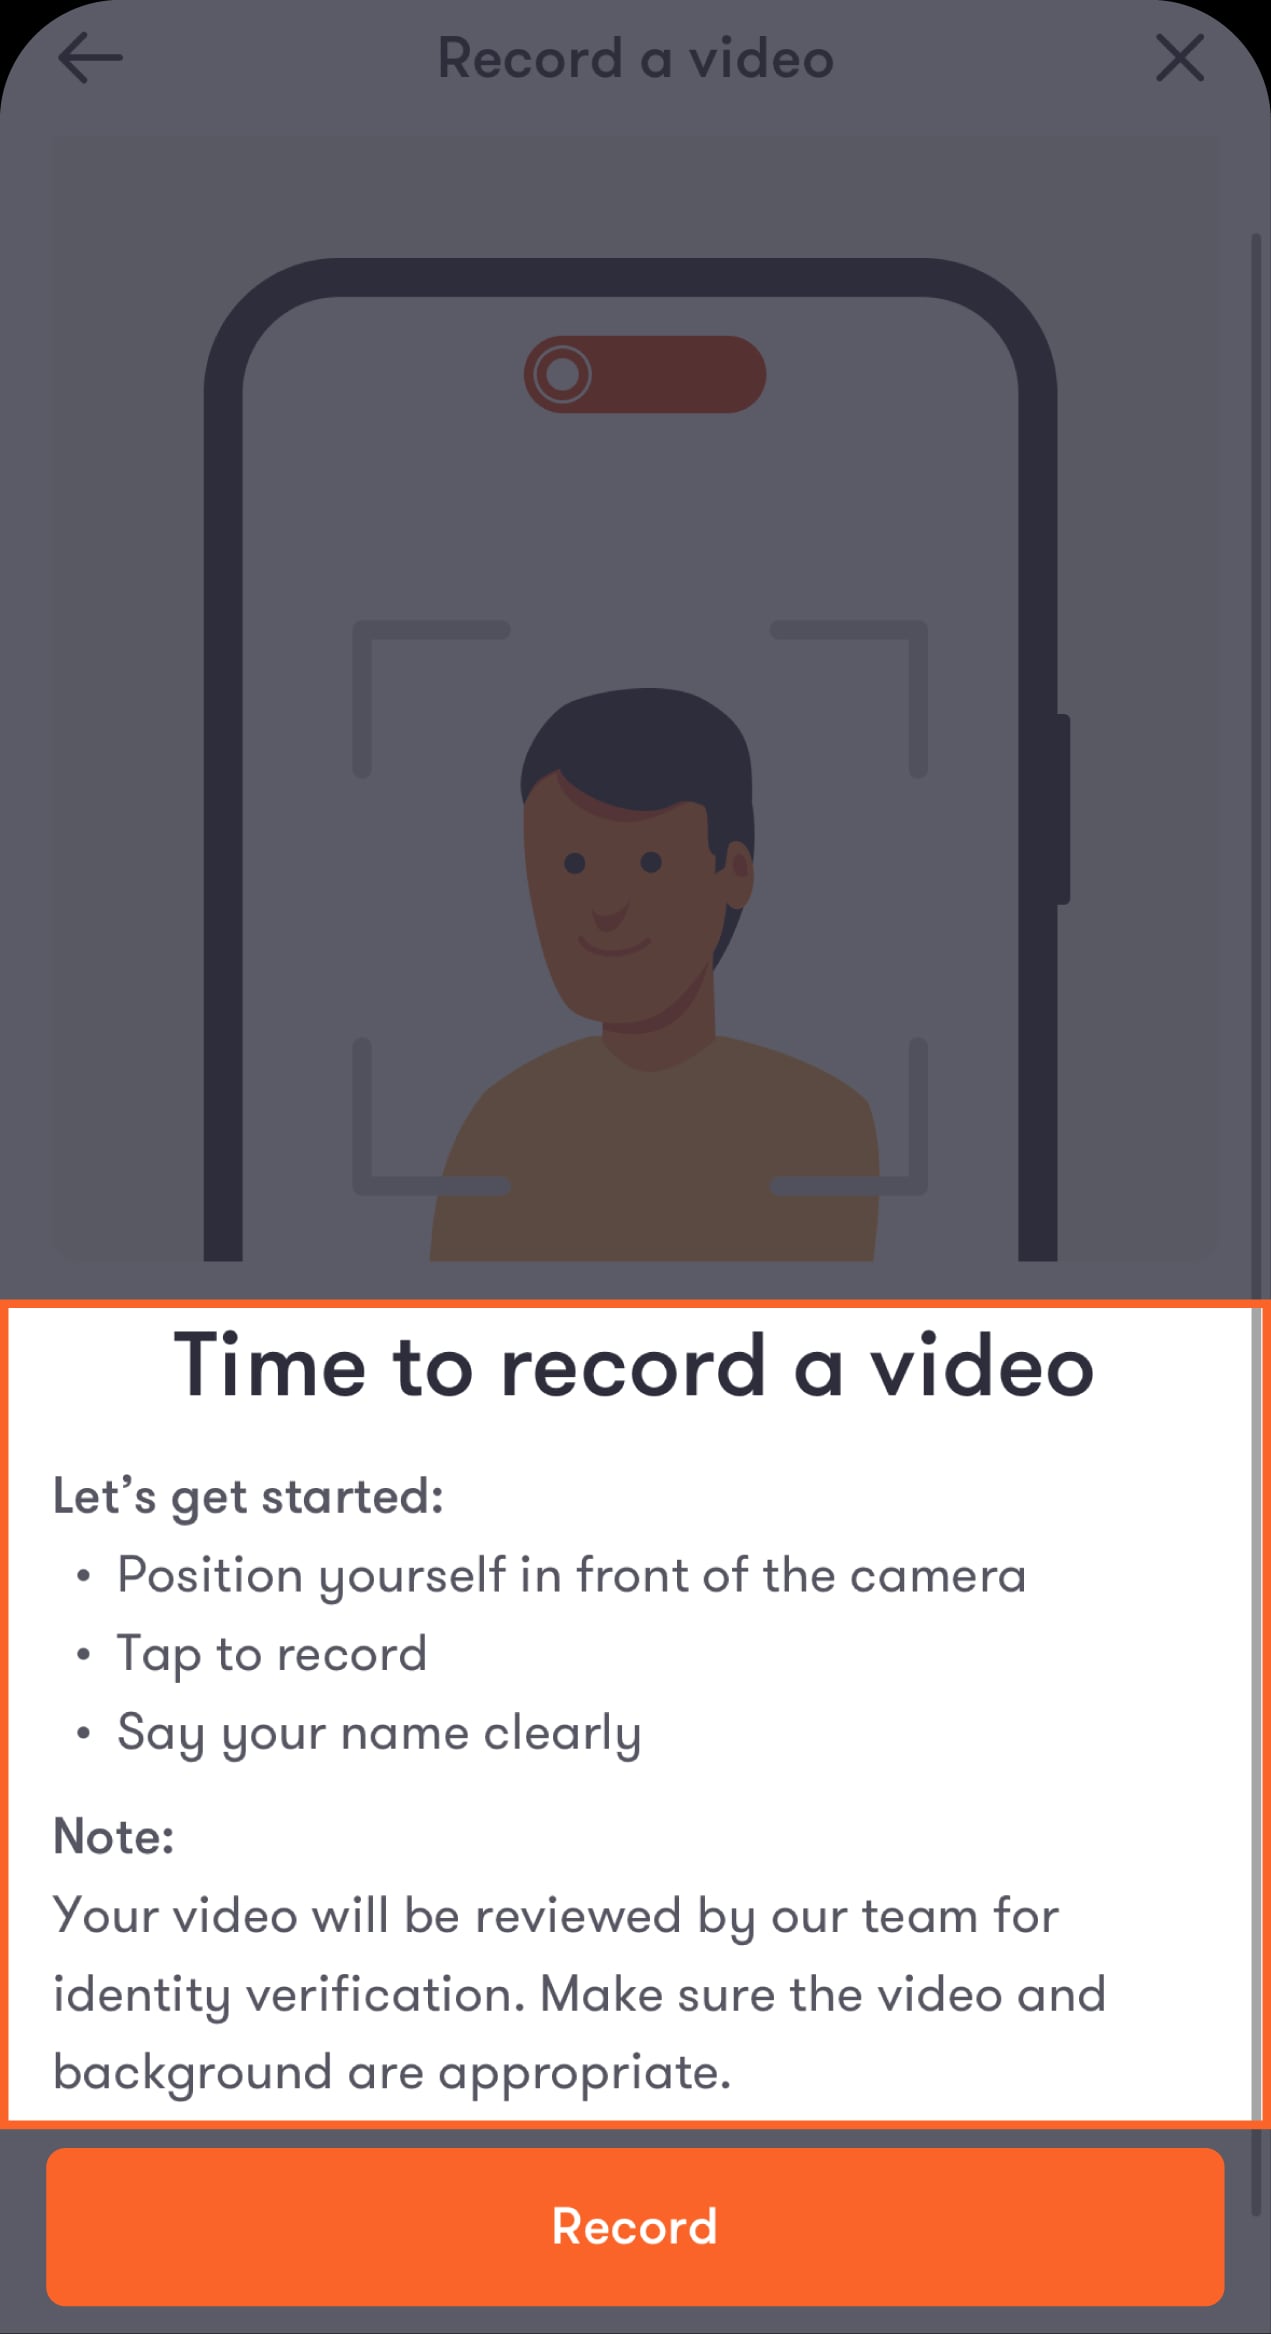
Record a video of yourself
Read the instructions, then tap “Record” to start recording.
Step 15 of 28
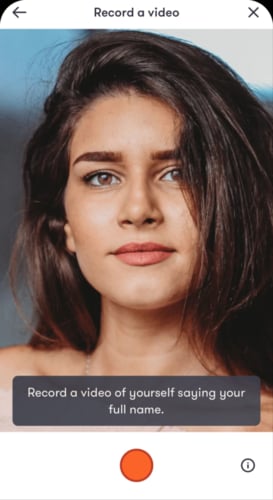
Record yourself saying your full name
You will then be directed to review the recorded video before it is submitted to our team for identity verification.
Step 16 of 28
Review your video before submitting it
If you’re satisfied with it, click “Submit” to continue, or click “Re-record” to take a new video. You will then be directed to set up your login.
Step 17 of 28
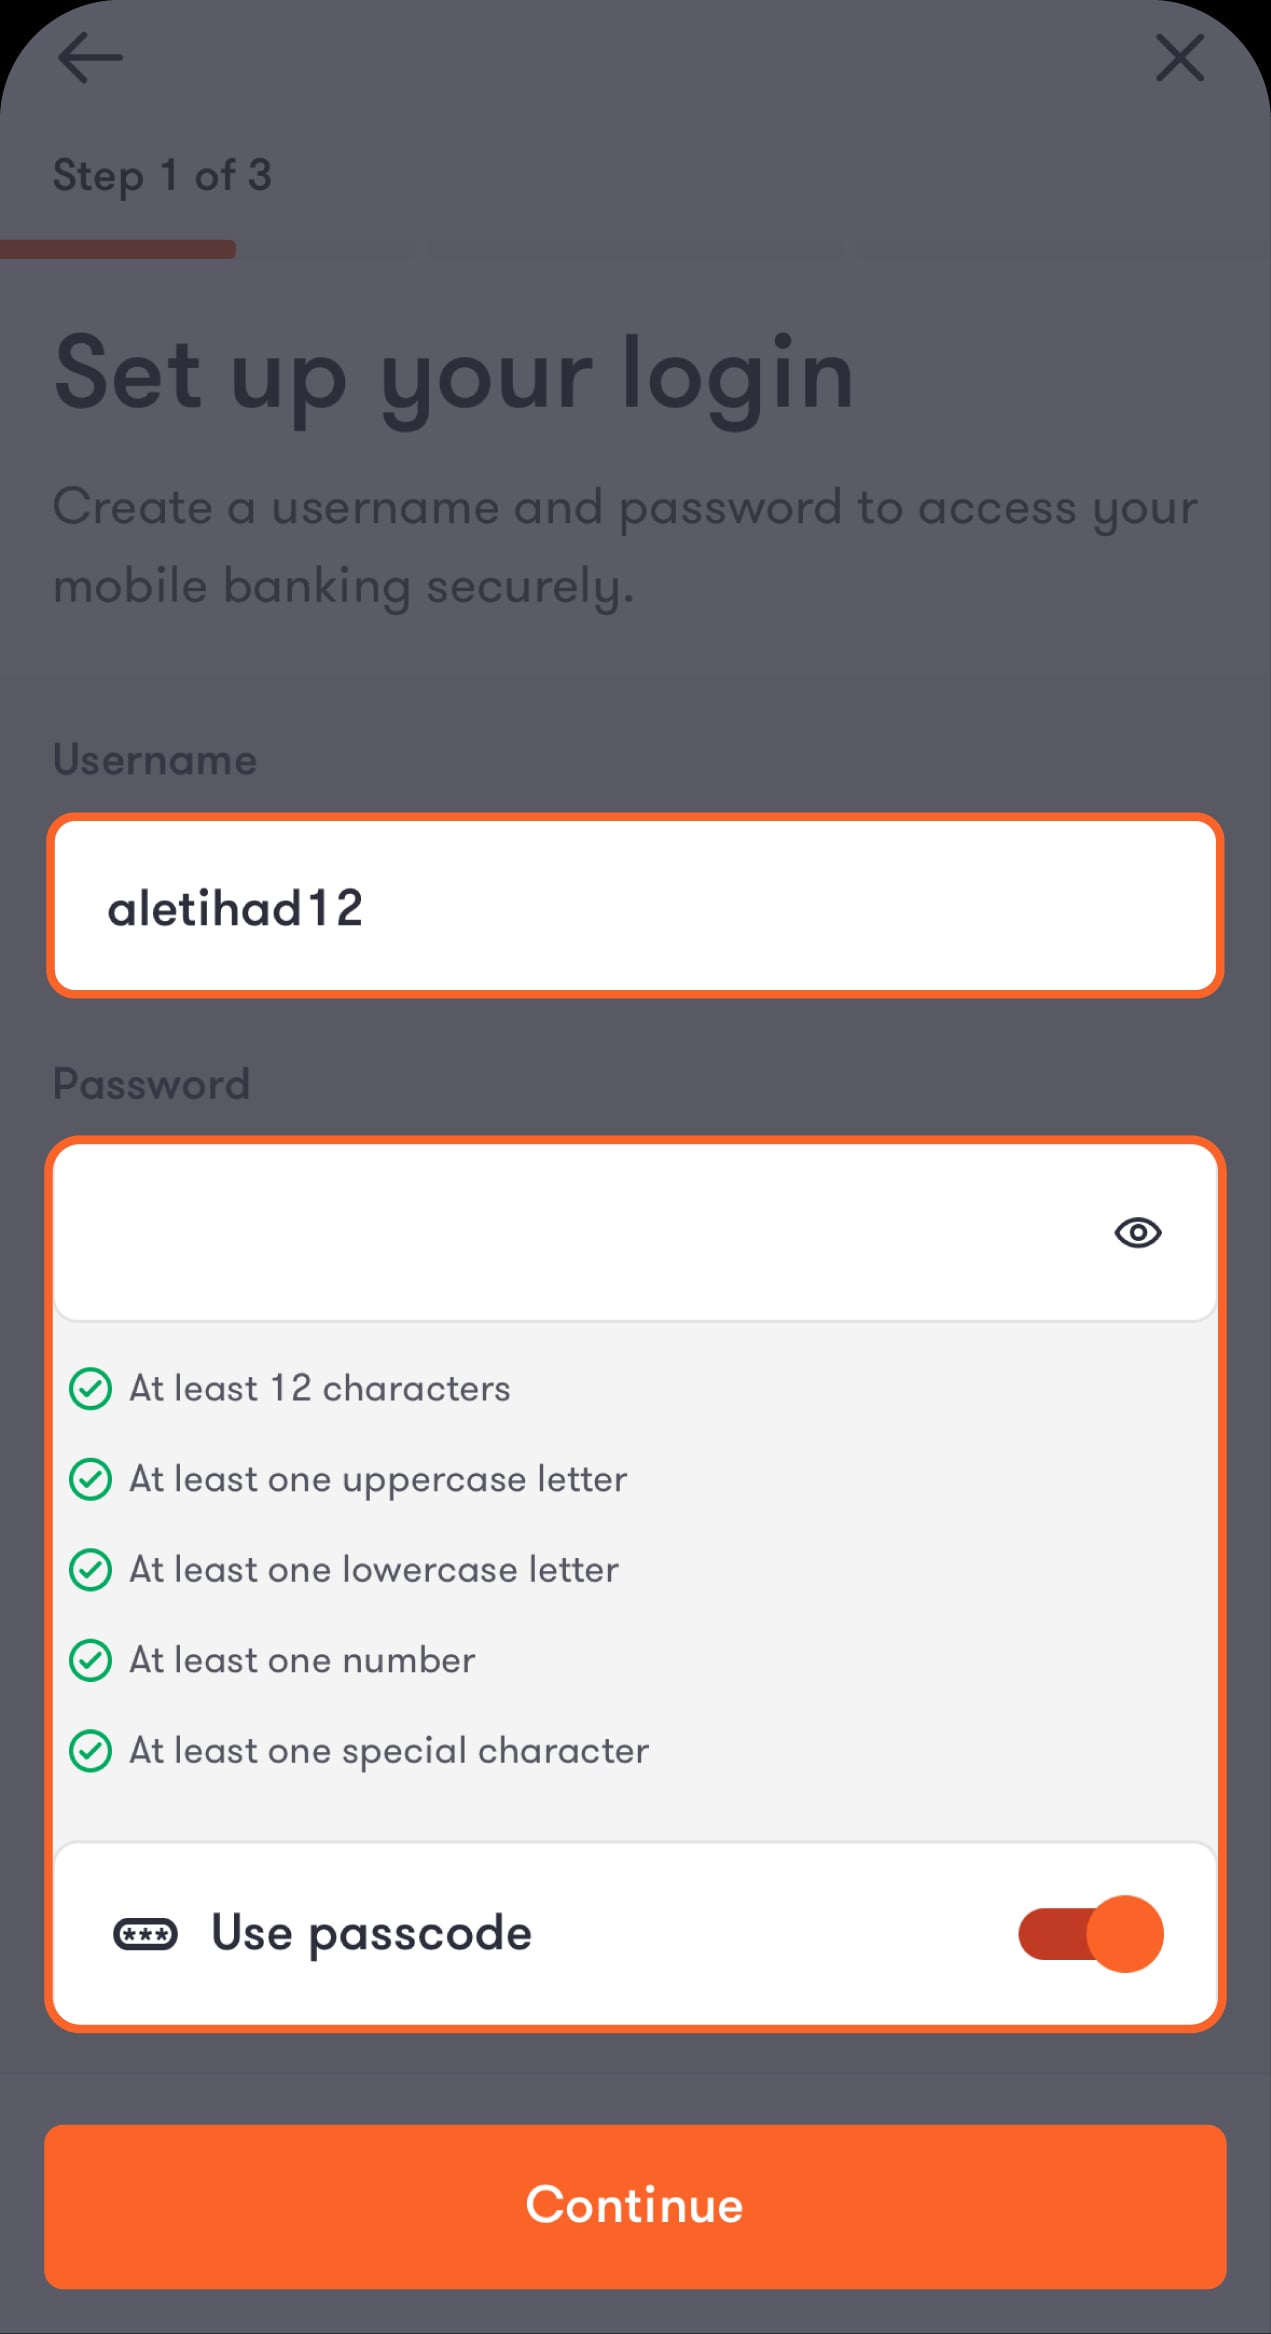
Create your username and password, then tap “Continue”
You will then be directed to set up a lock key for the app and then receive OTP.
Step 18 of 28
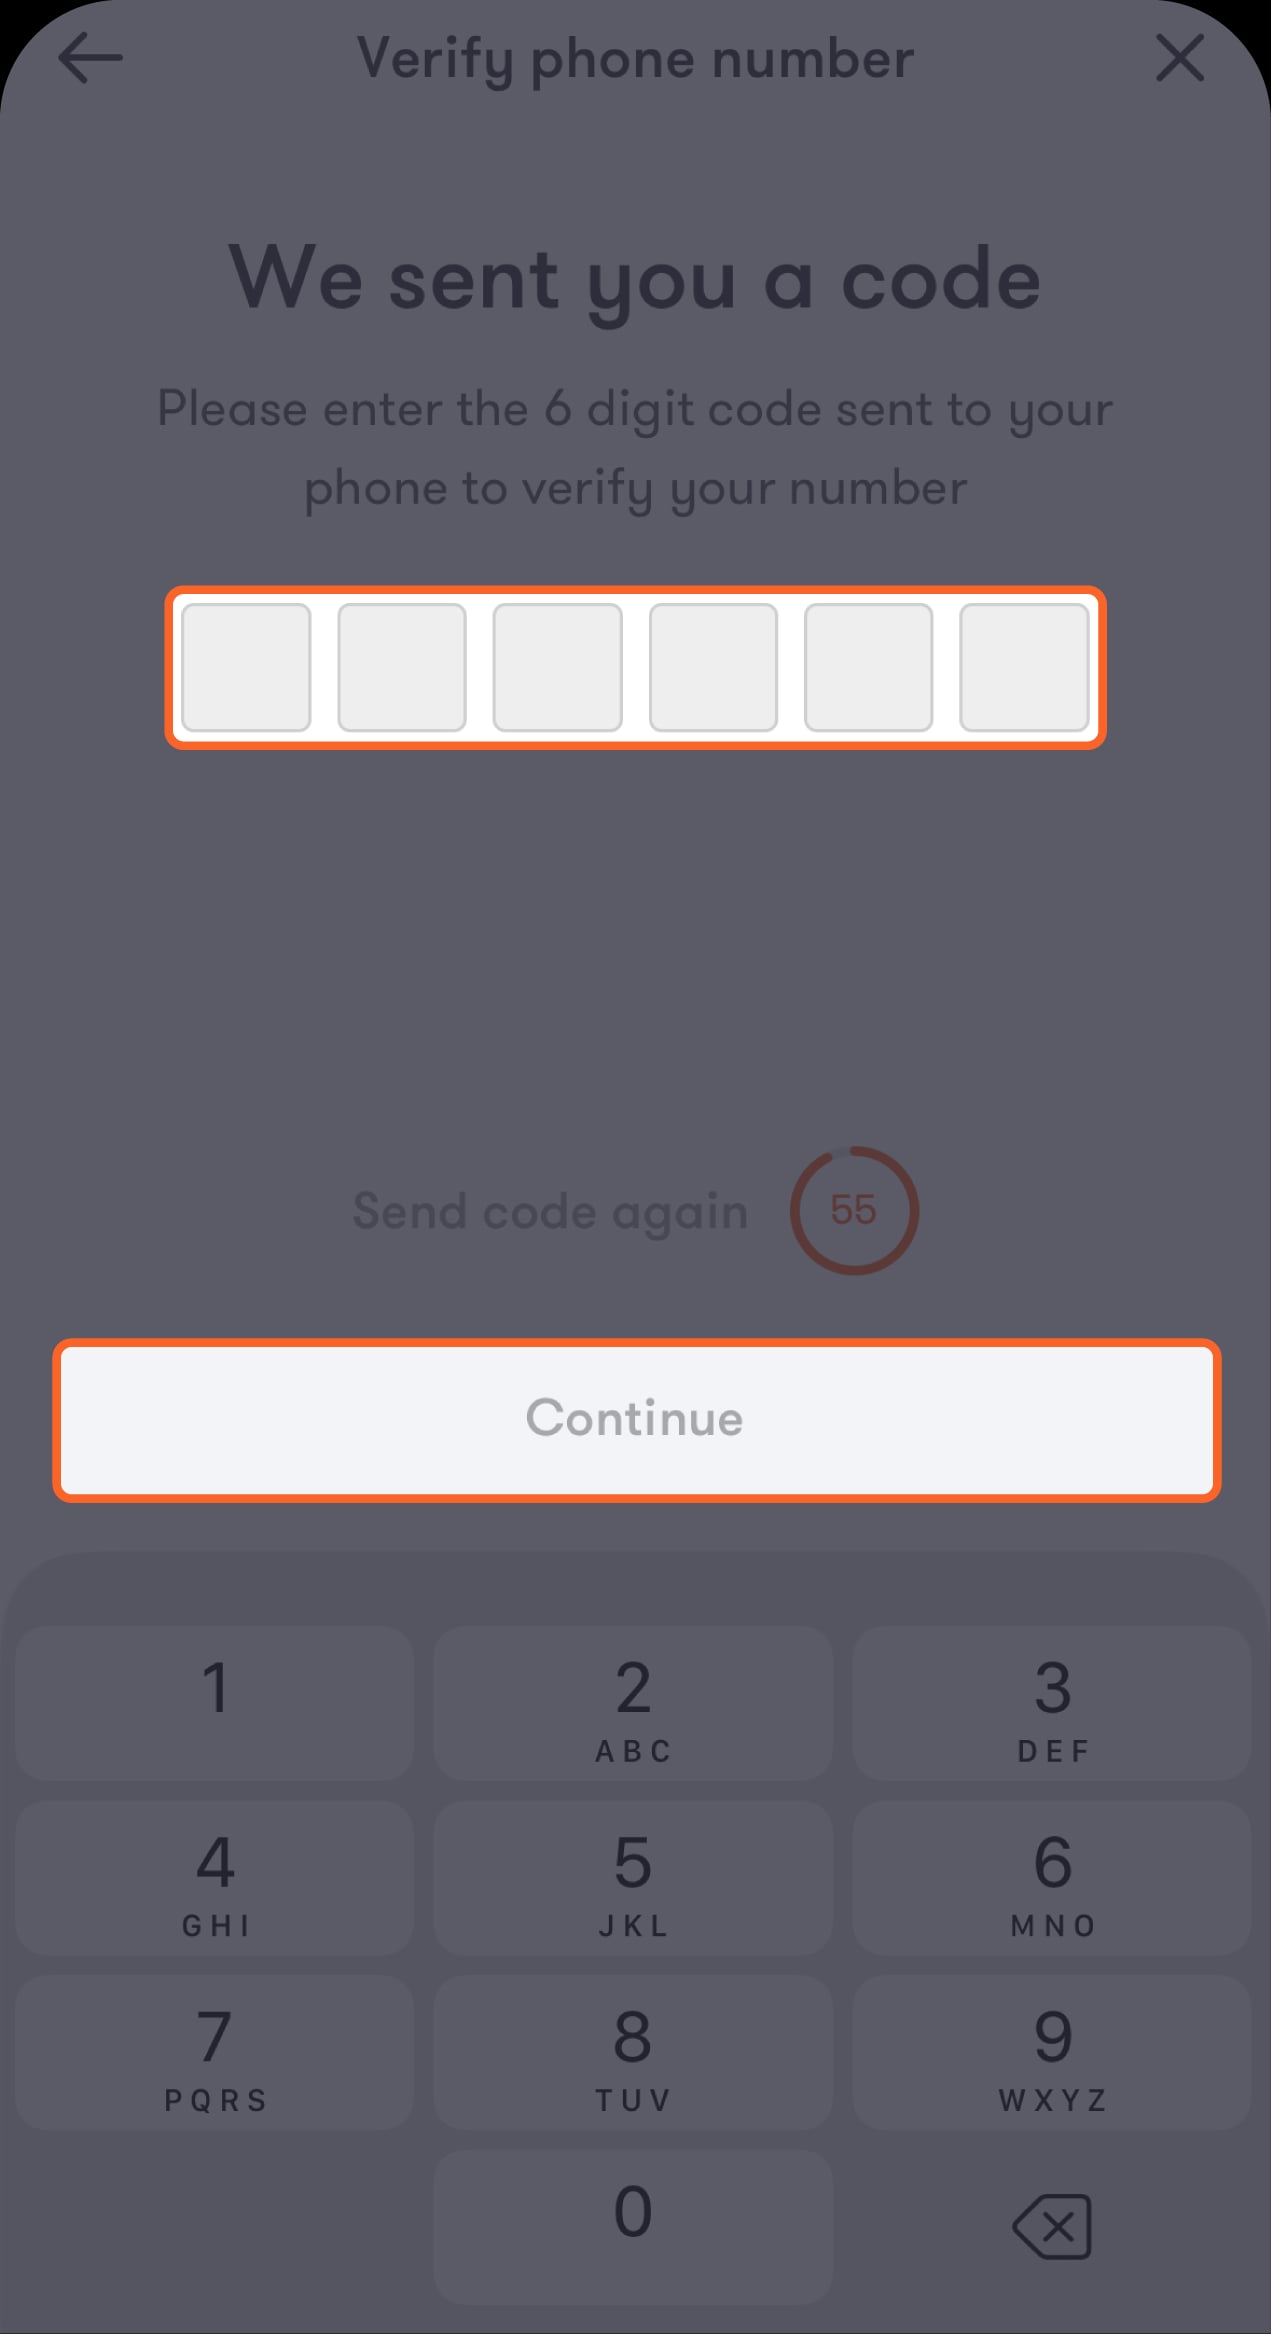
Enter the OTP sent to your registered mobile number
Then, tap "Continue" to proceed to fill in your home address.
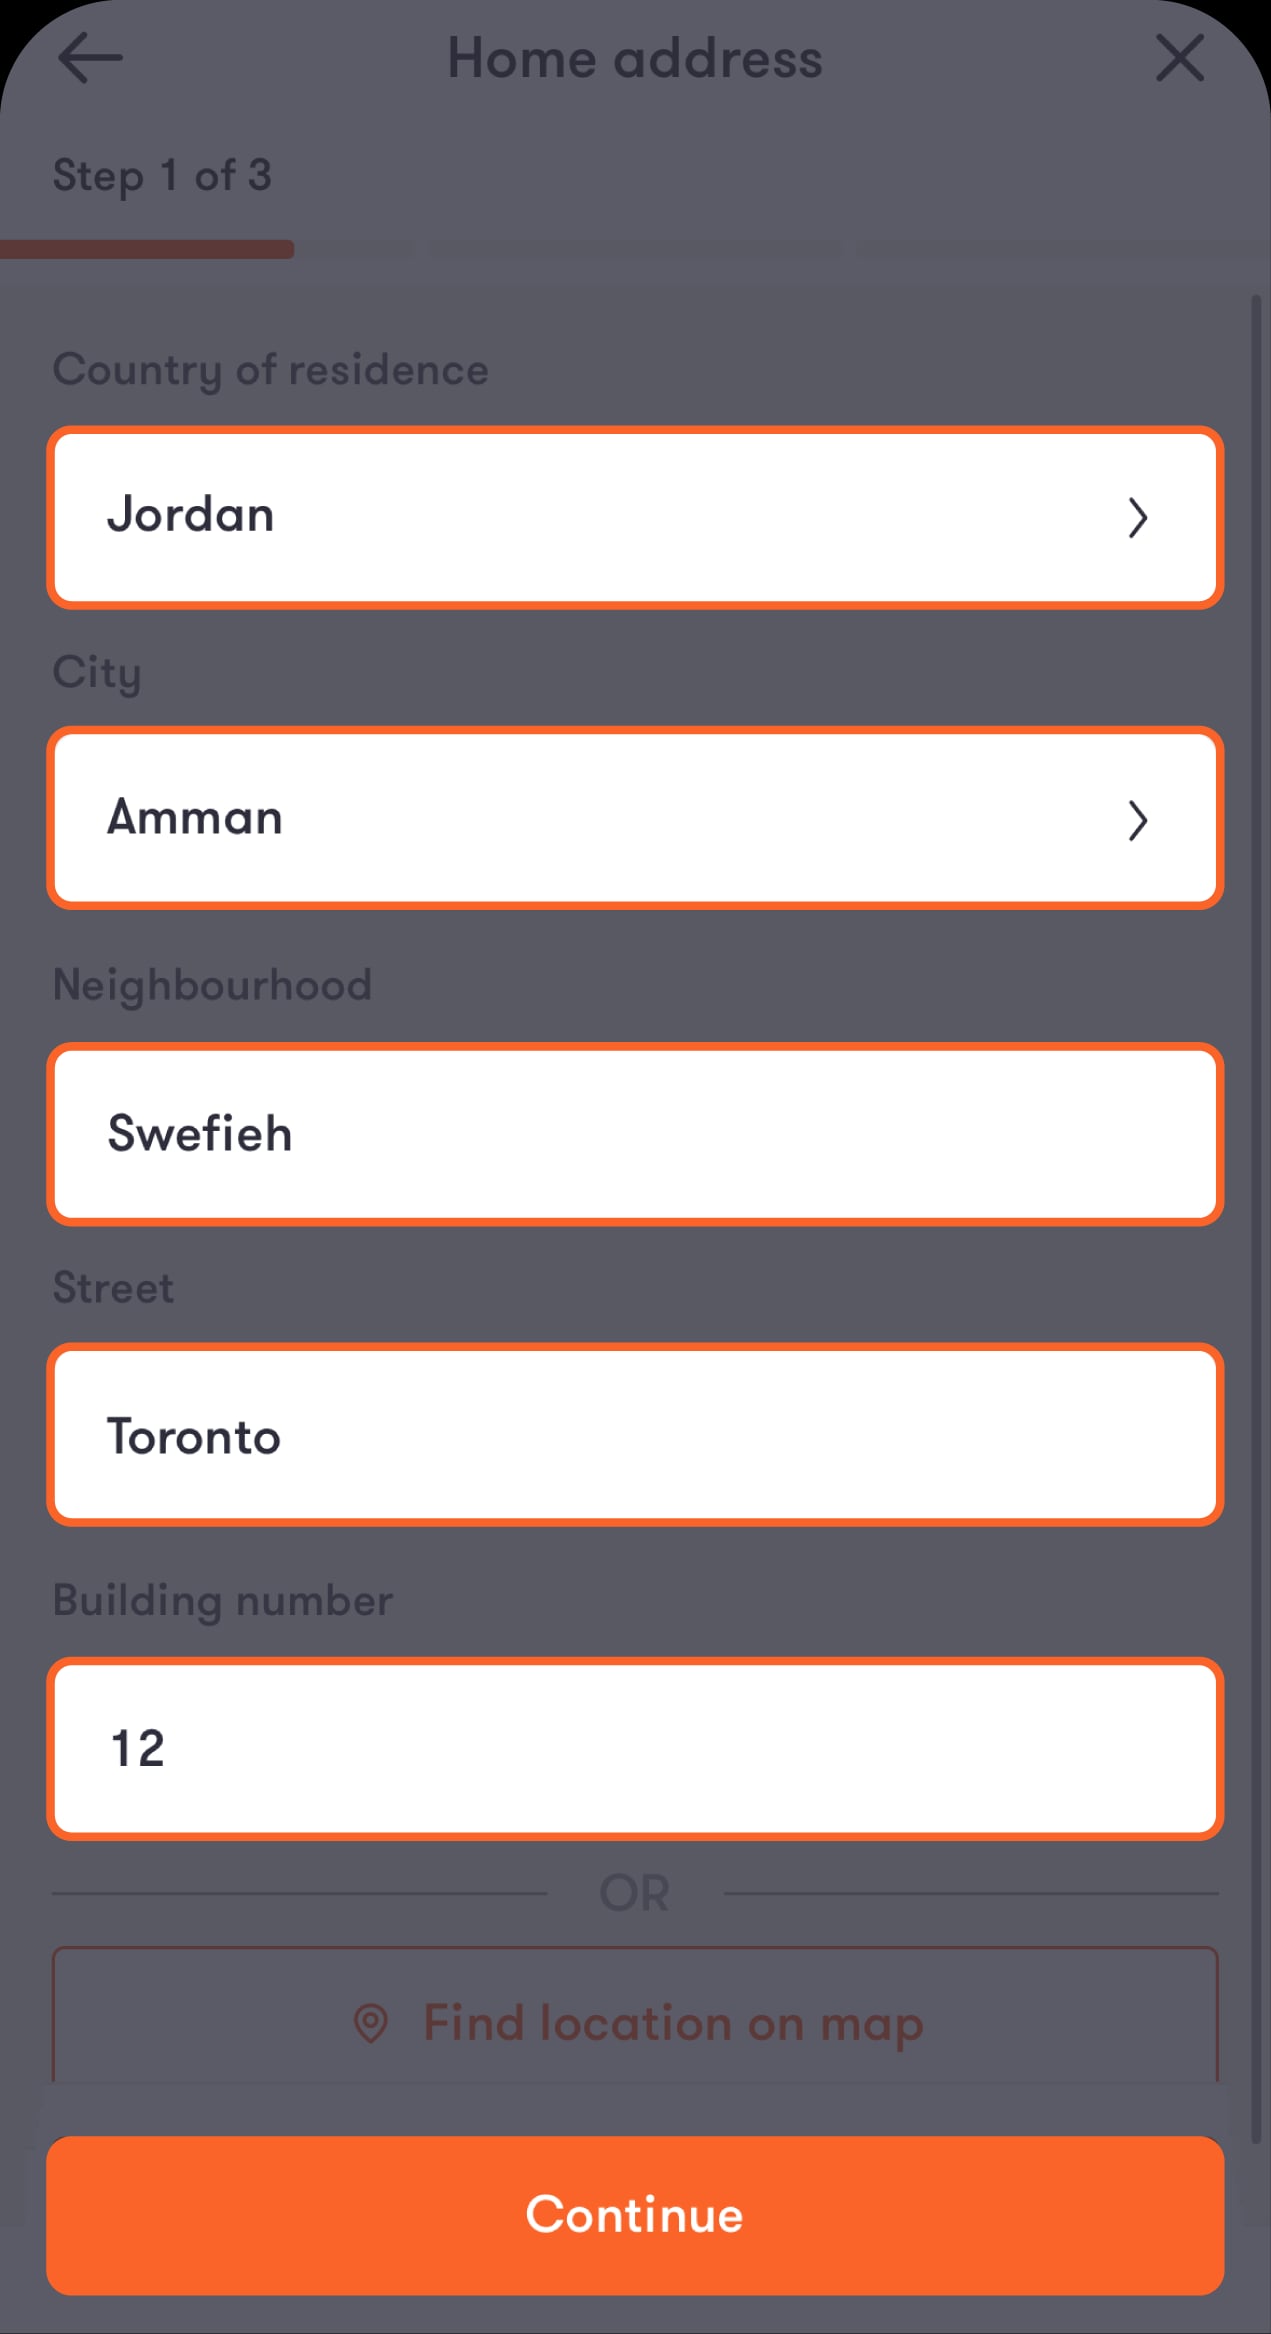
Step 19 of 28
Fill in your home address details
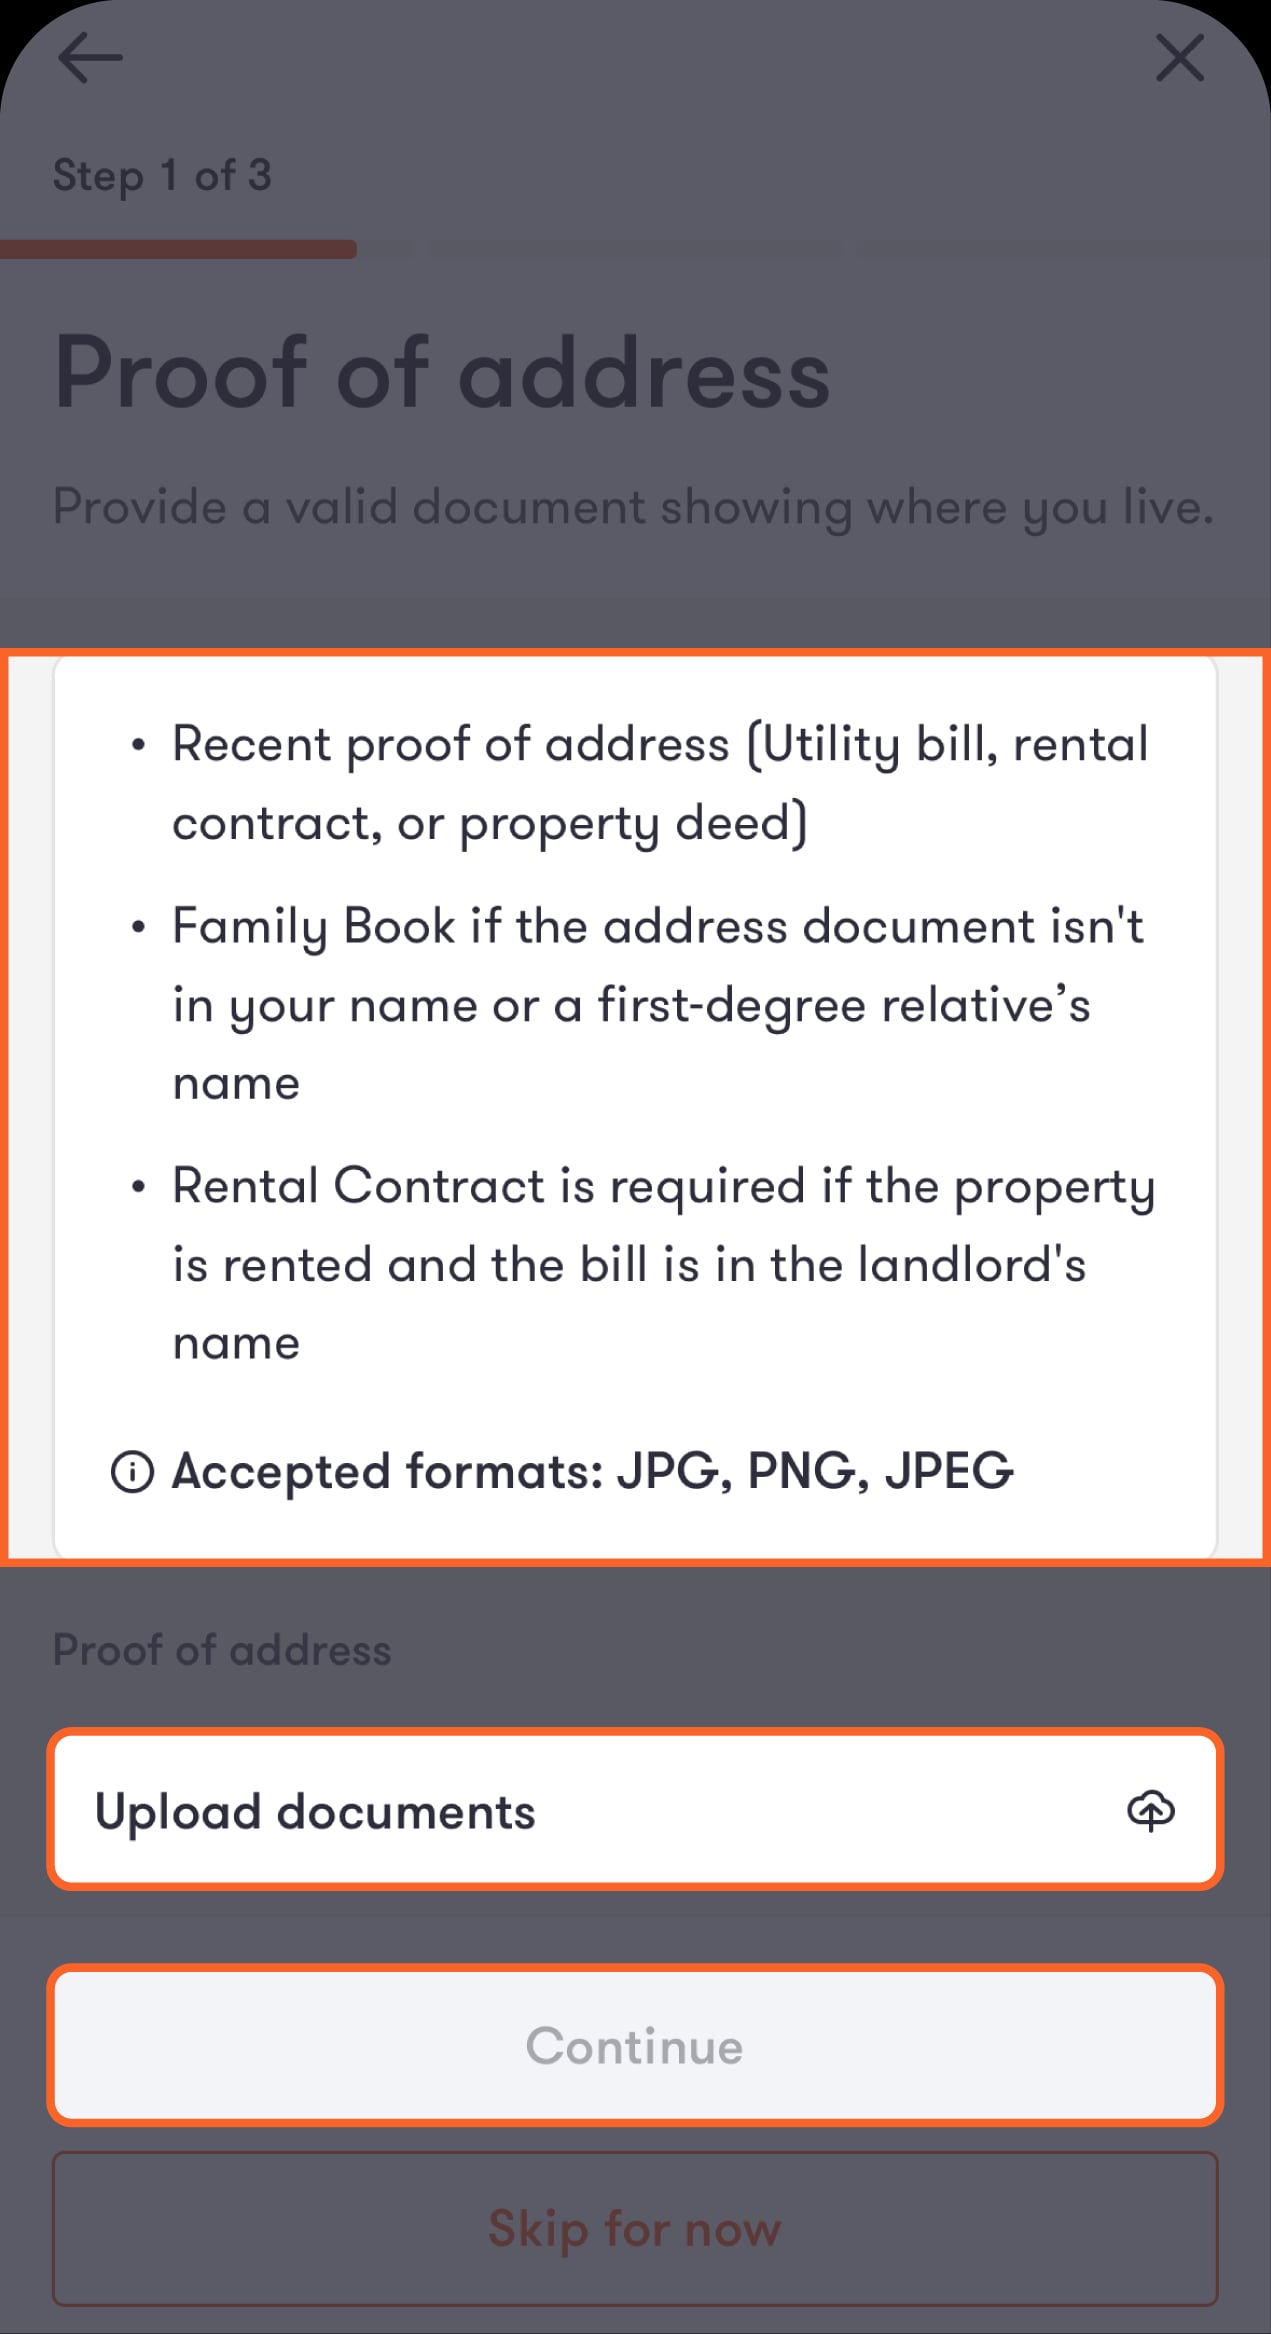
You will then be directed to upload proof of address documents.
Step 20 of 28
Upload your proof of address, then tap “Continue” at the bottom of the screen.
If you skip this step, you can continue opening your account and submit the document later if needed.
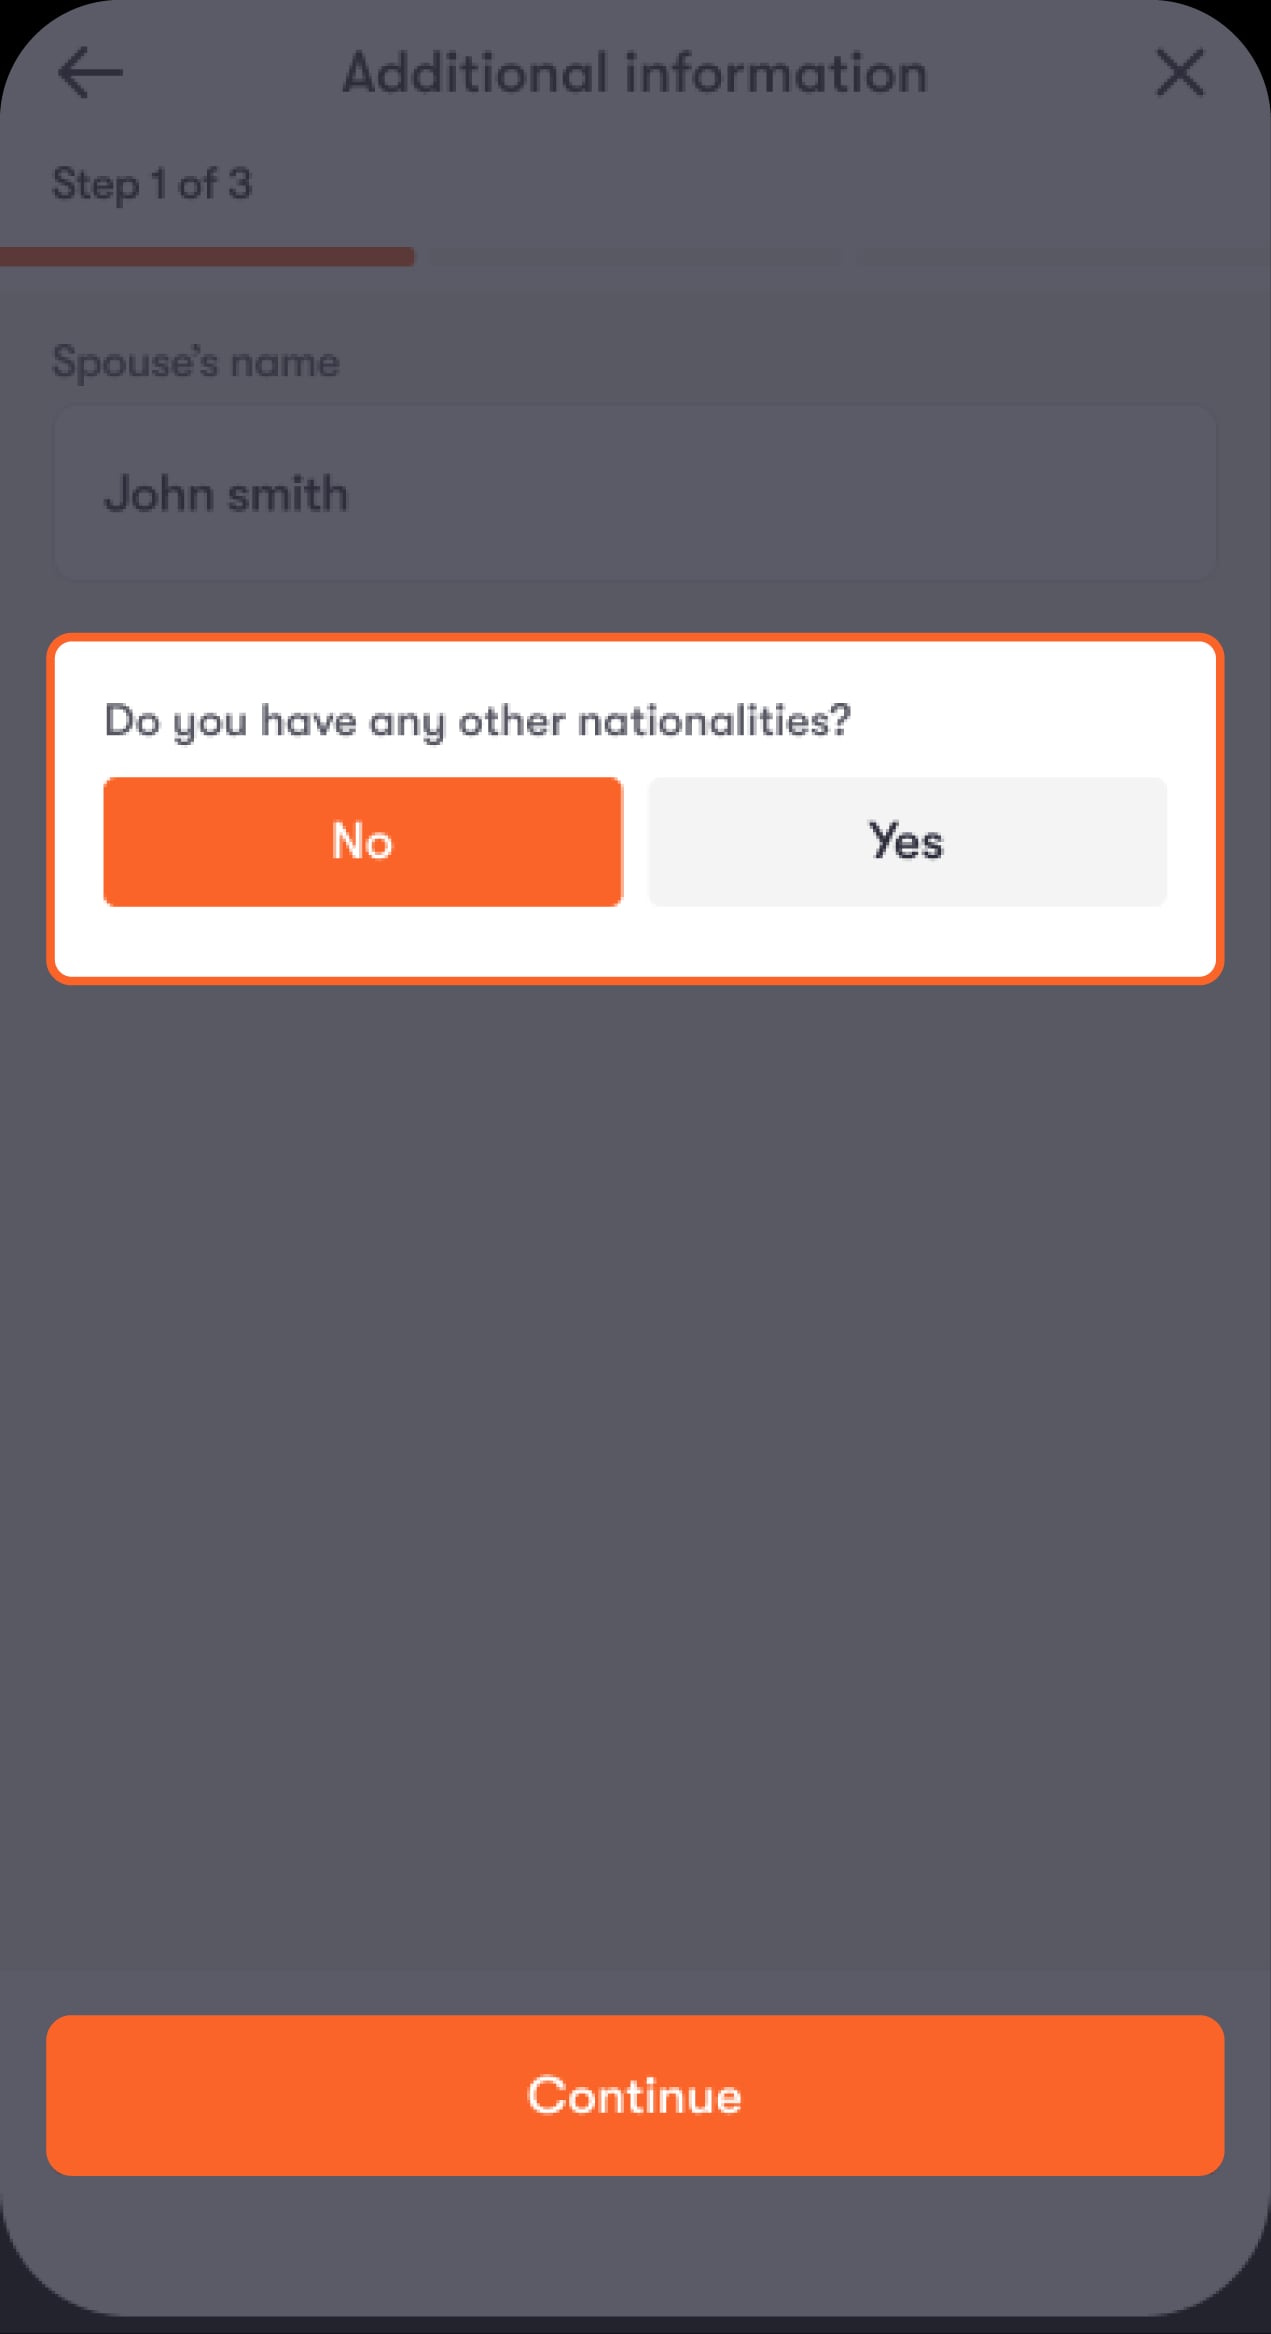
Step 21 of 28
Answer a few additional questions, then tap "Continue" at the bottom of the screen
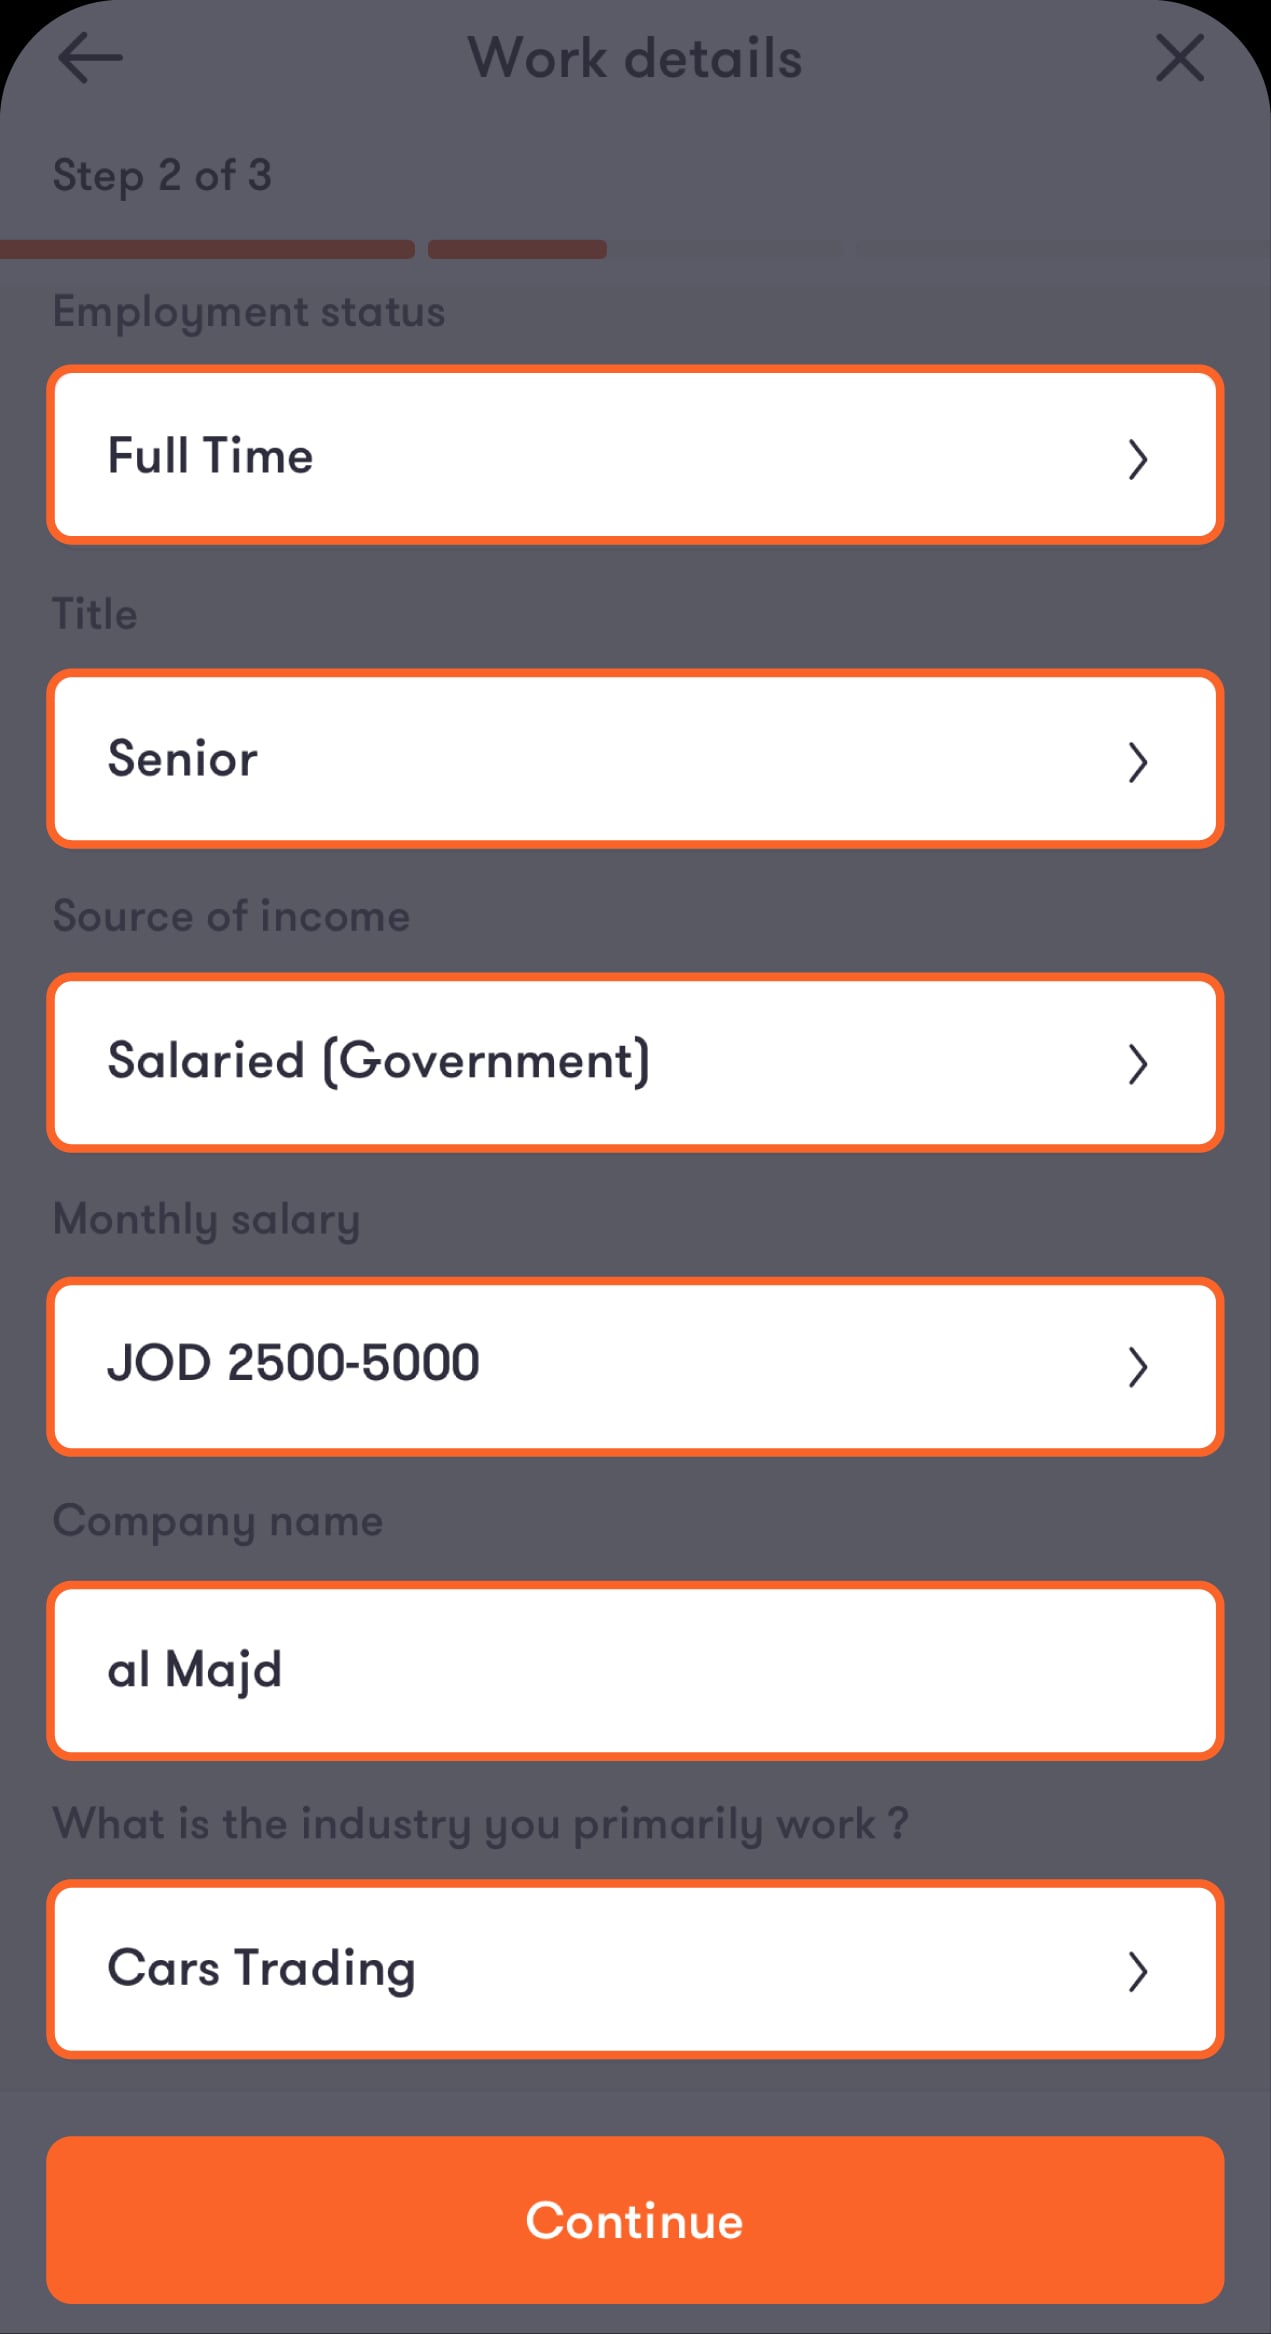
You will then be directed to provide your work details.
Step 22 of 28
Fill in your work details, then tap "Continue"
You will then be directed to enter your work address
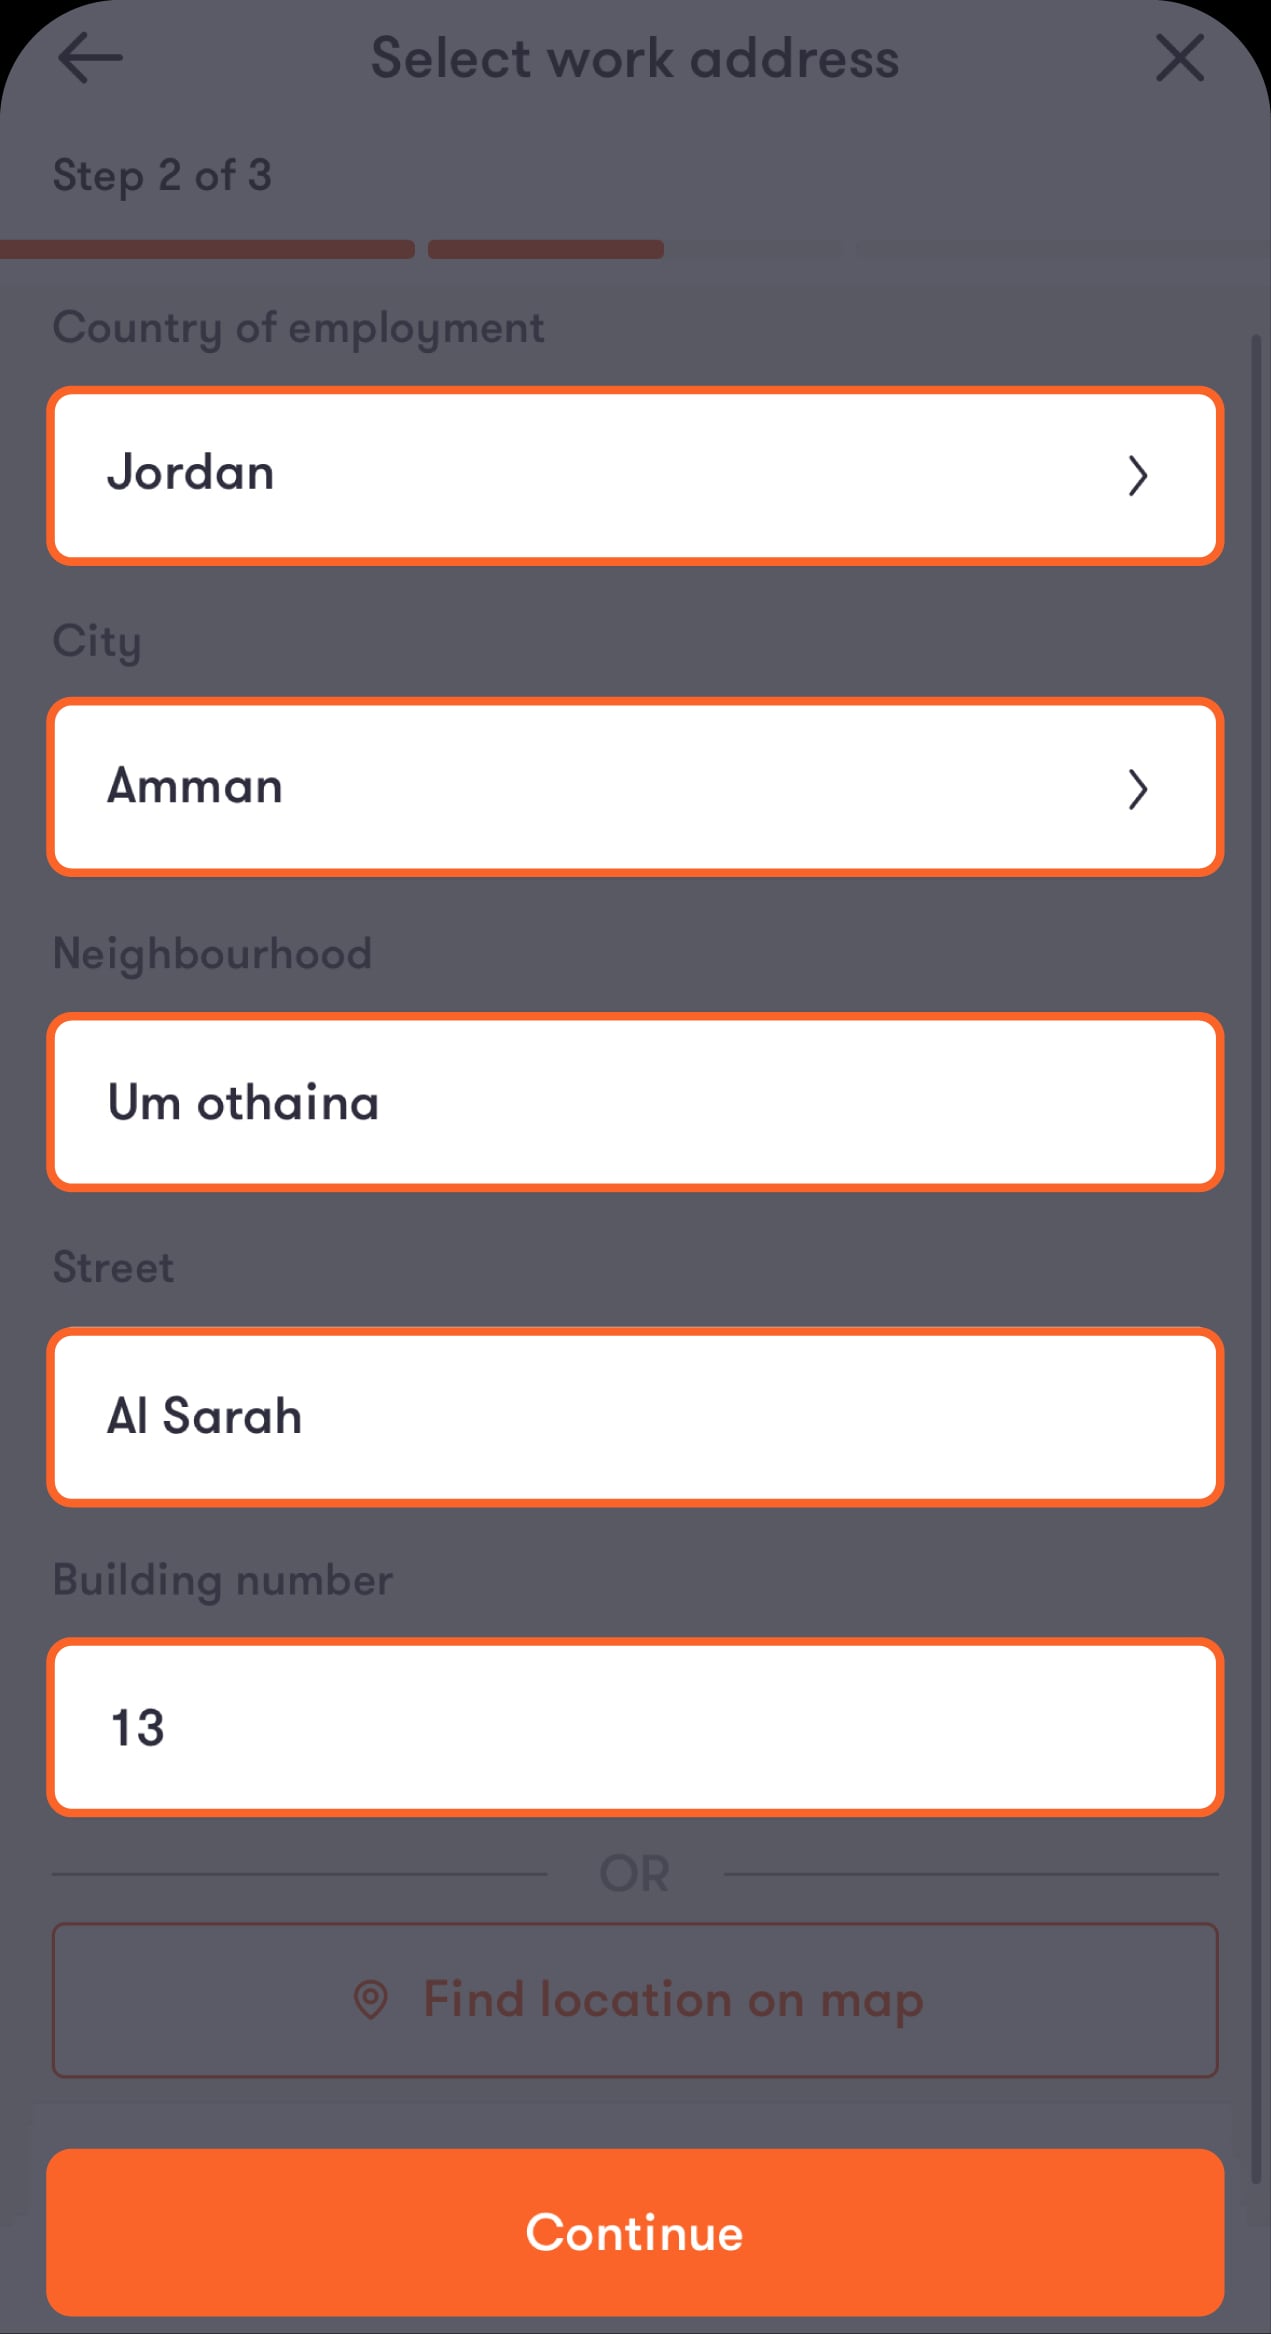
Step 23 of 28
Enter your work address, then tap “Continue” at the bottom of the screen
You will then be directed to select the purpose of your account.
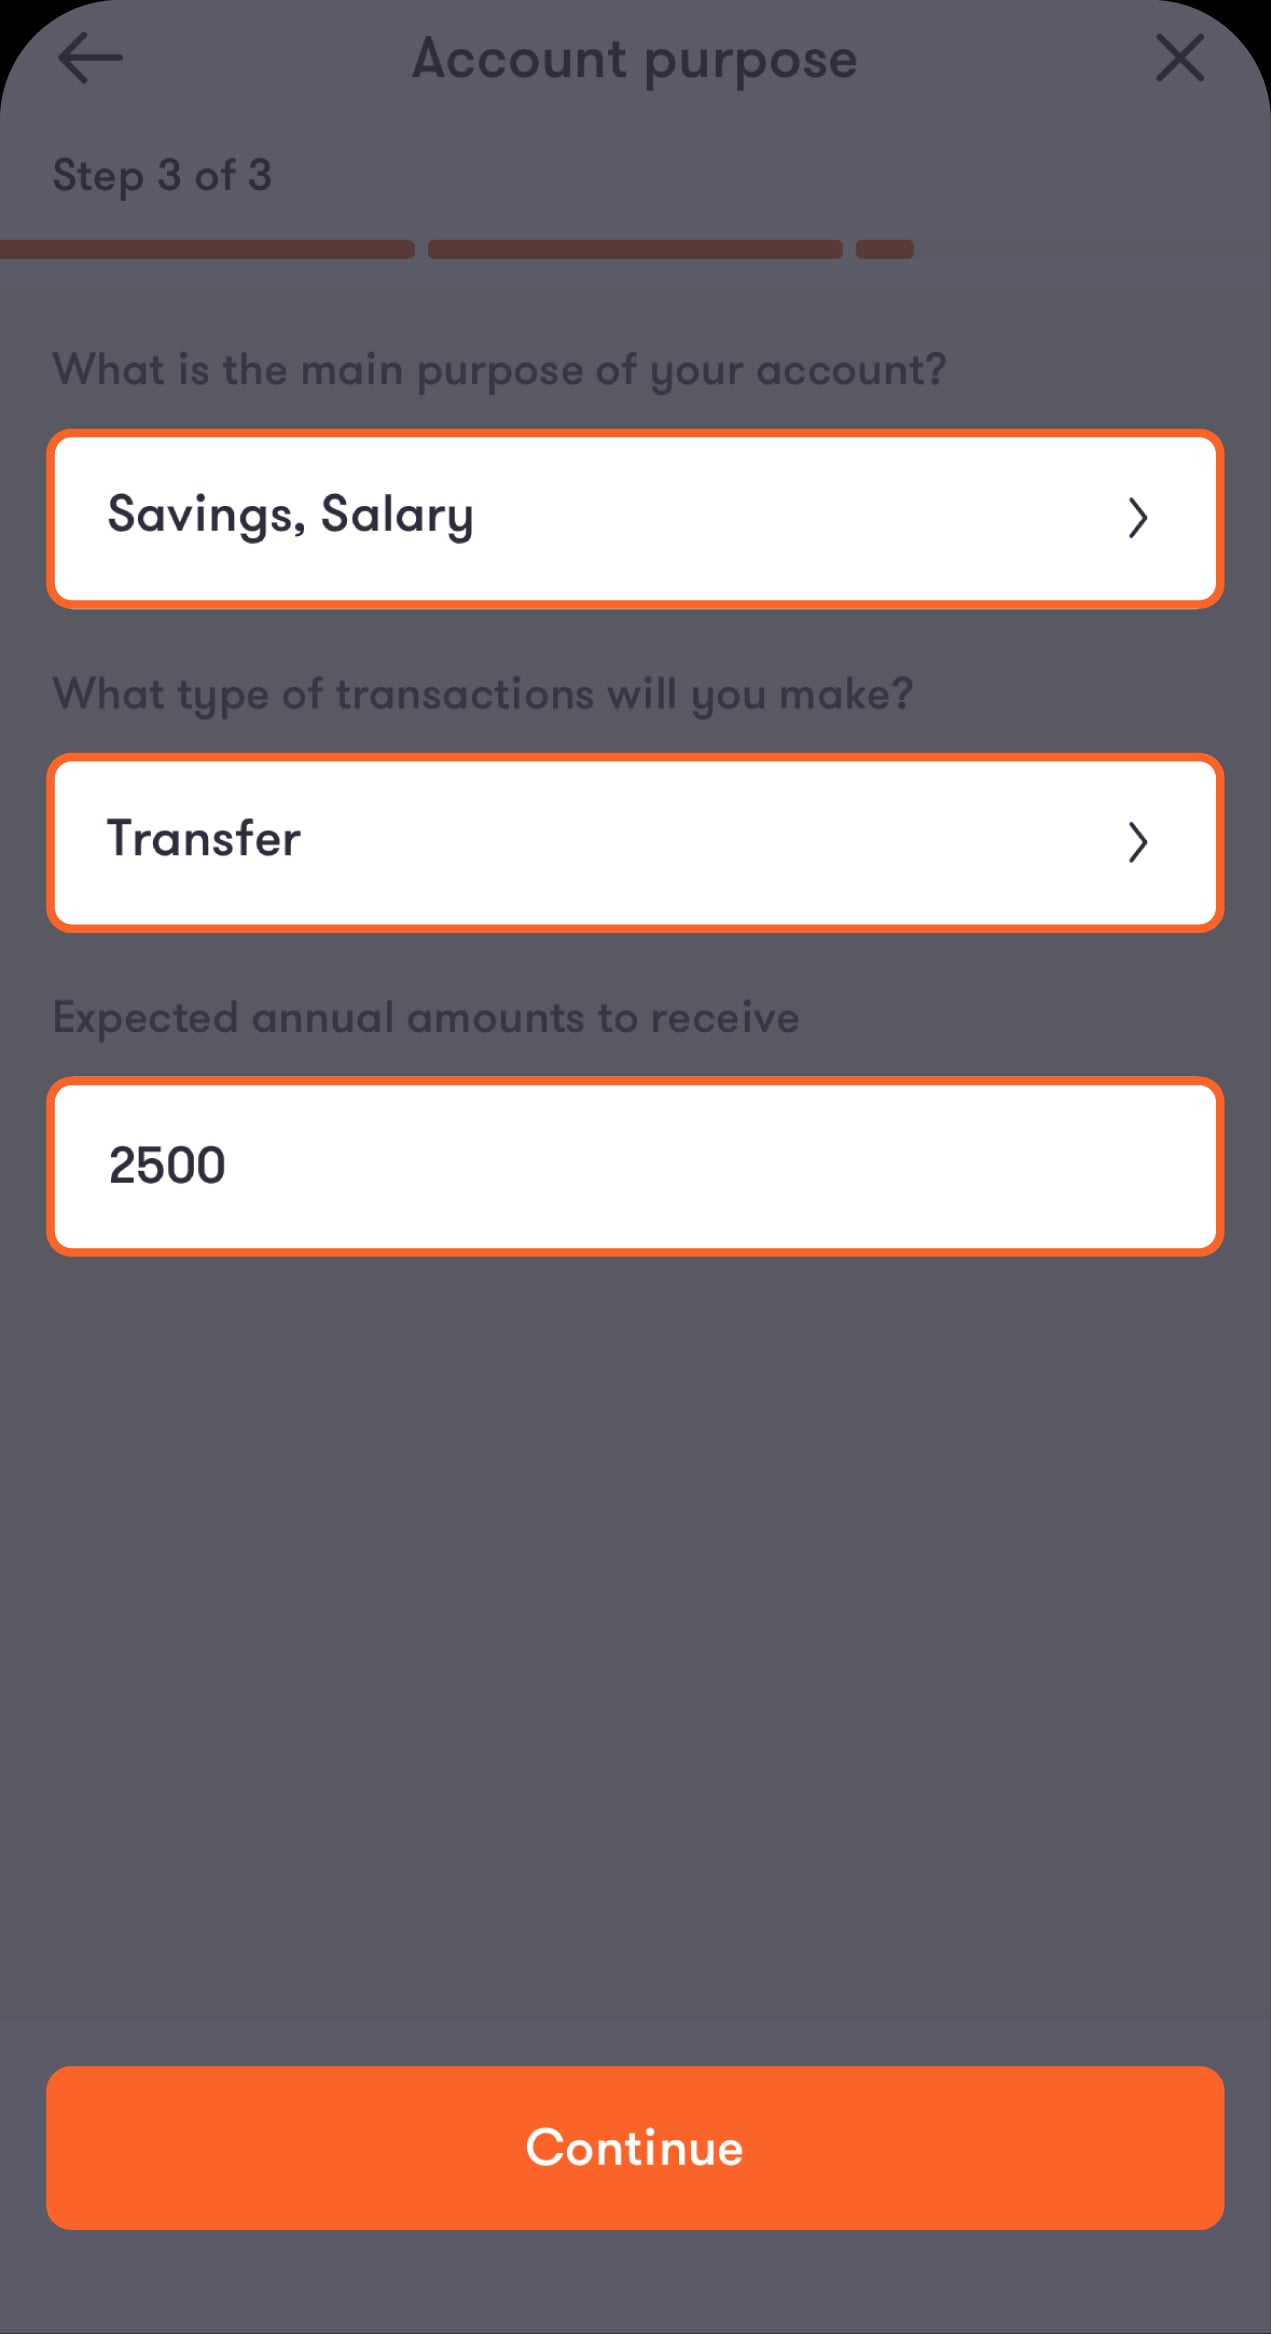
Step 24 of 28
Answer a few questions about the purpose of your account and expected activity
You will then be directed to review and accept the terms and conditions.
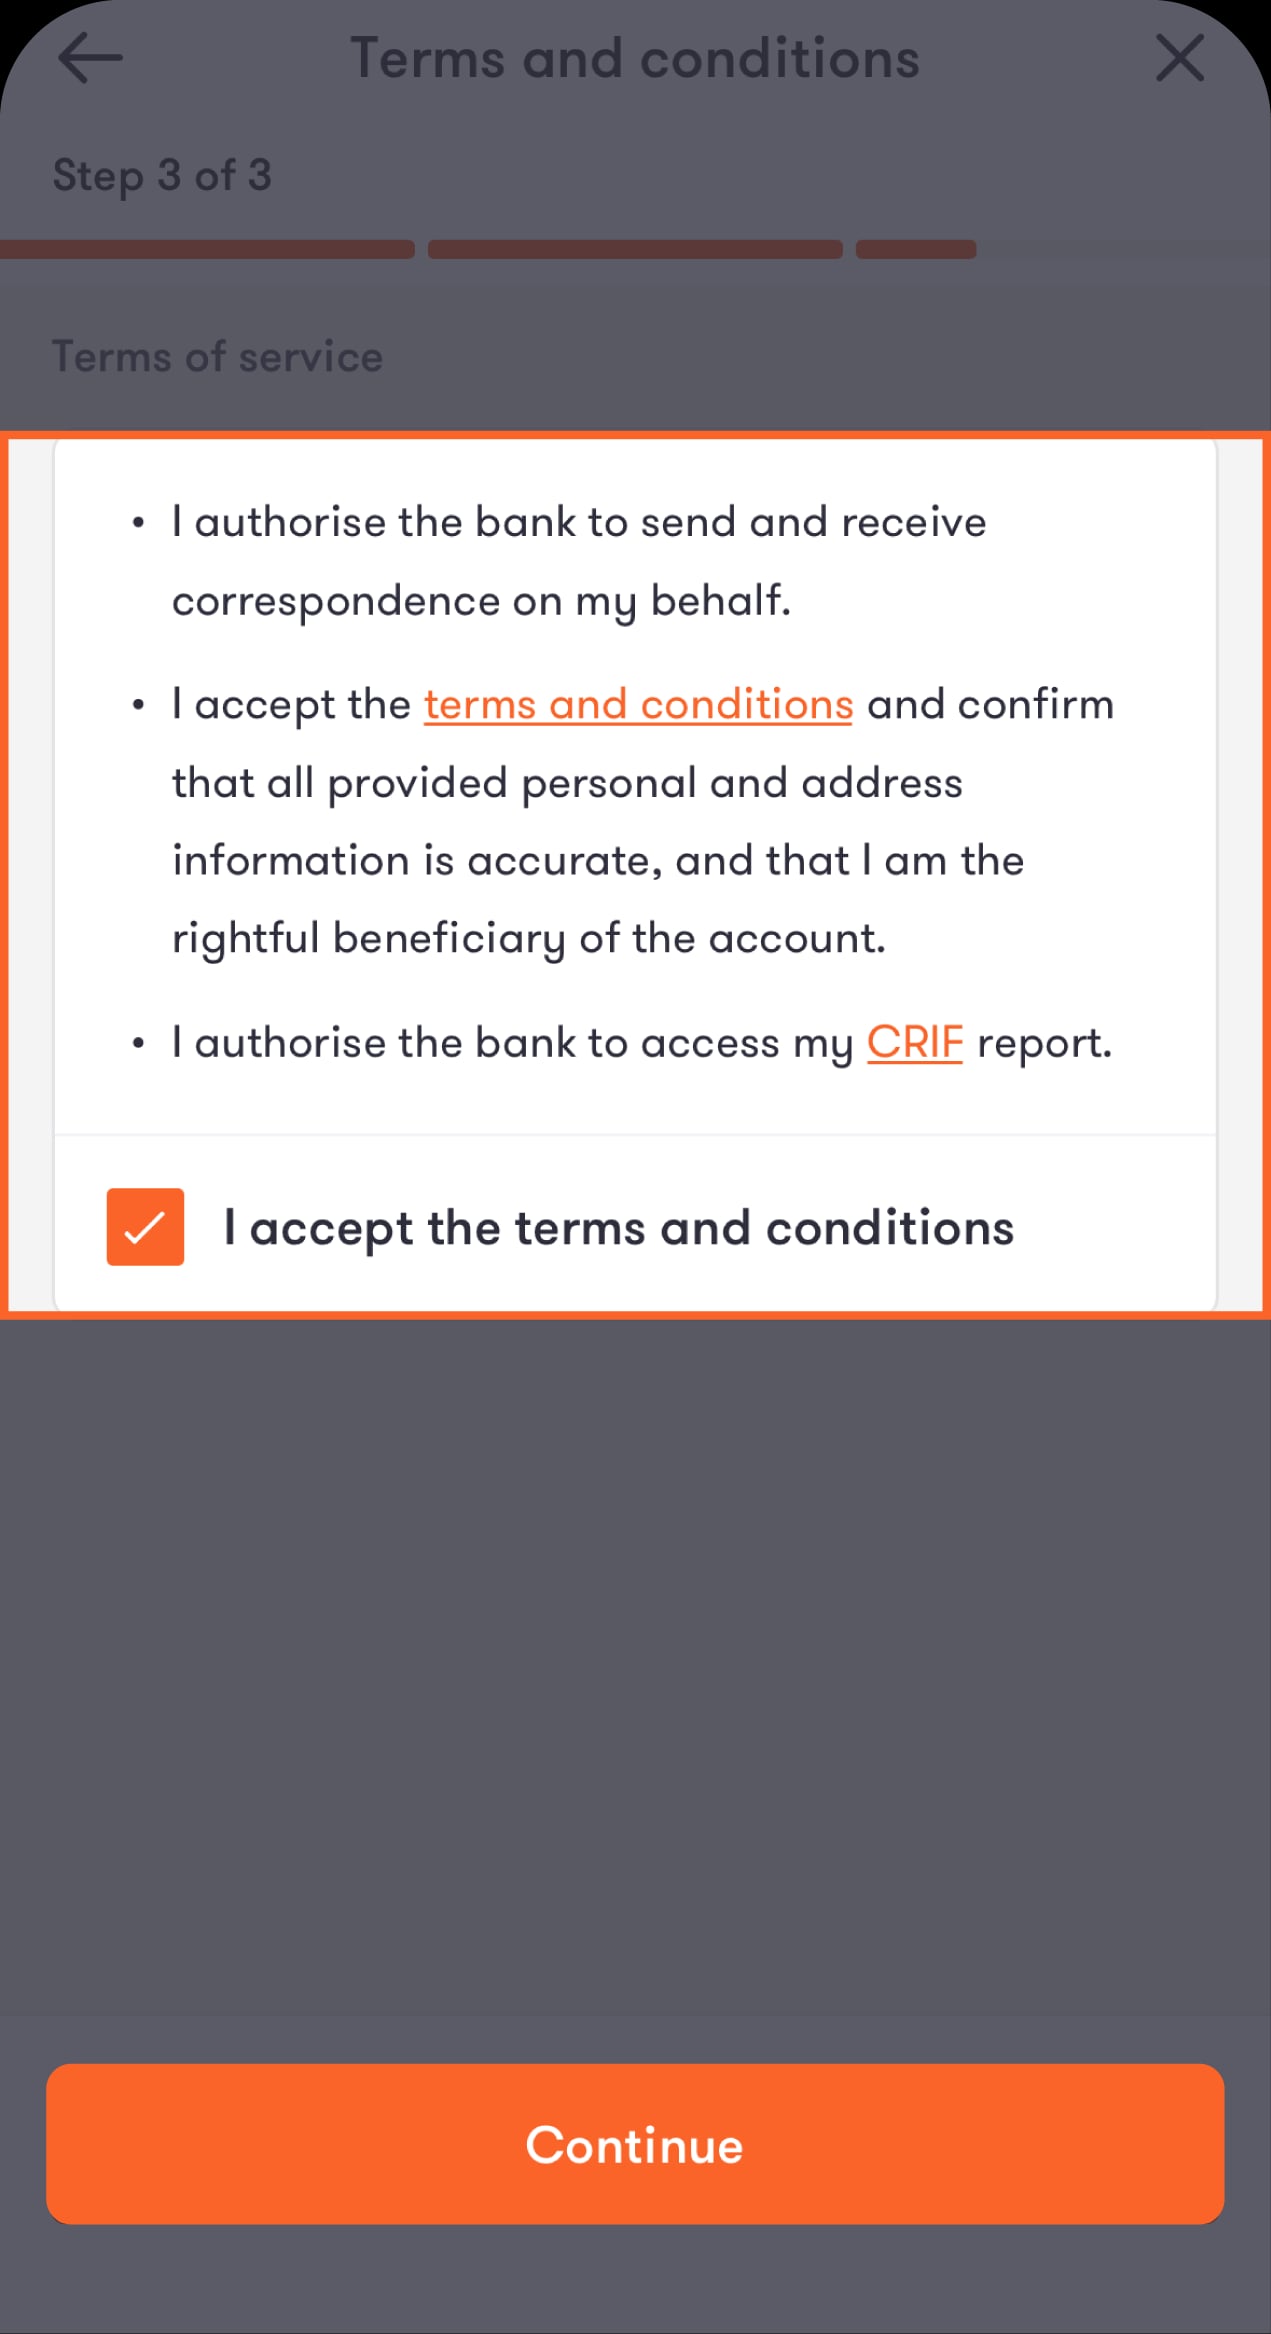
Step 25 of 28
Review and accept the terms and conditions, then click “Continue”
You will then be directed to set your debit card PIN.
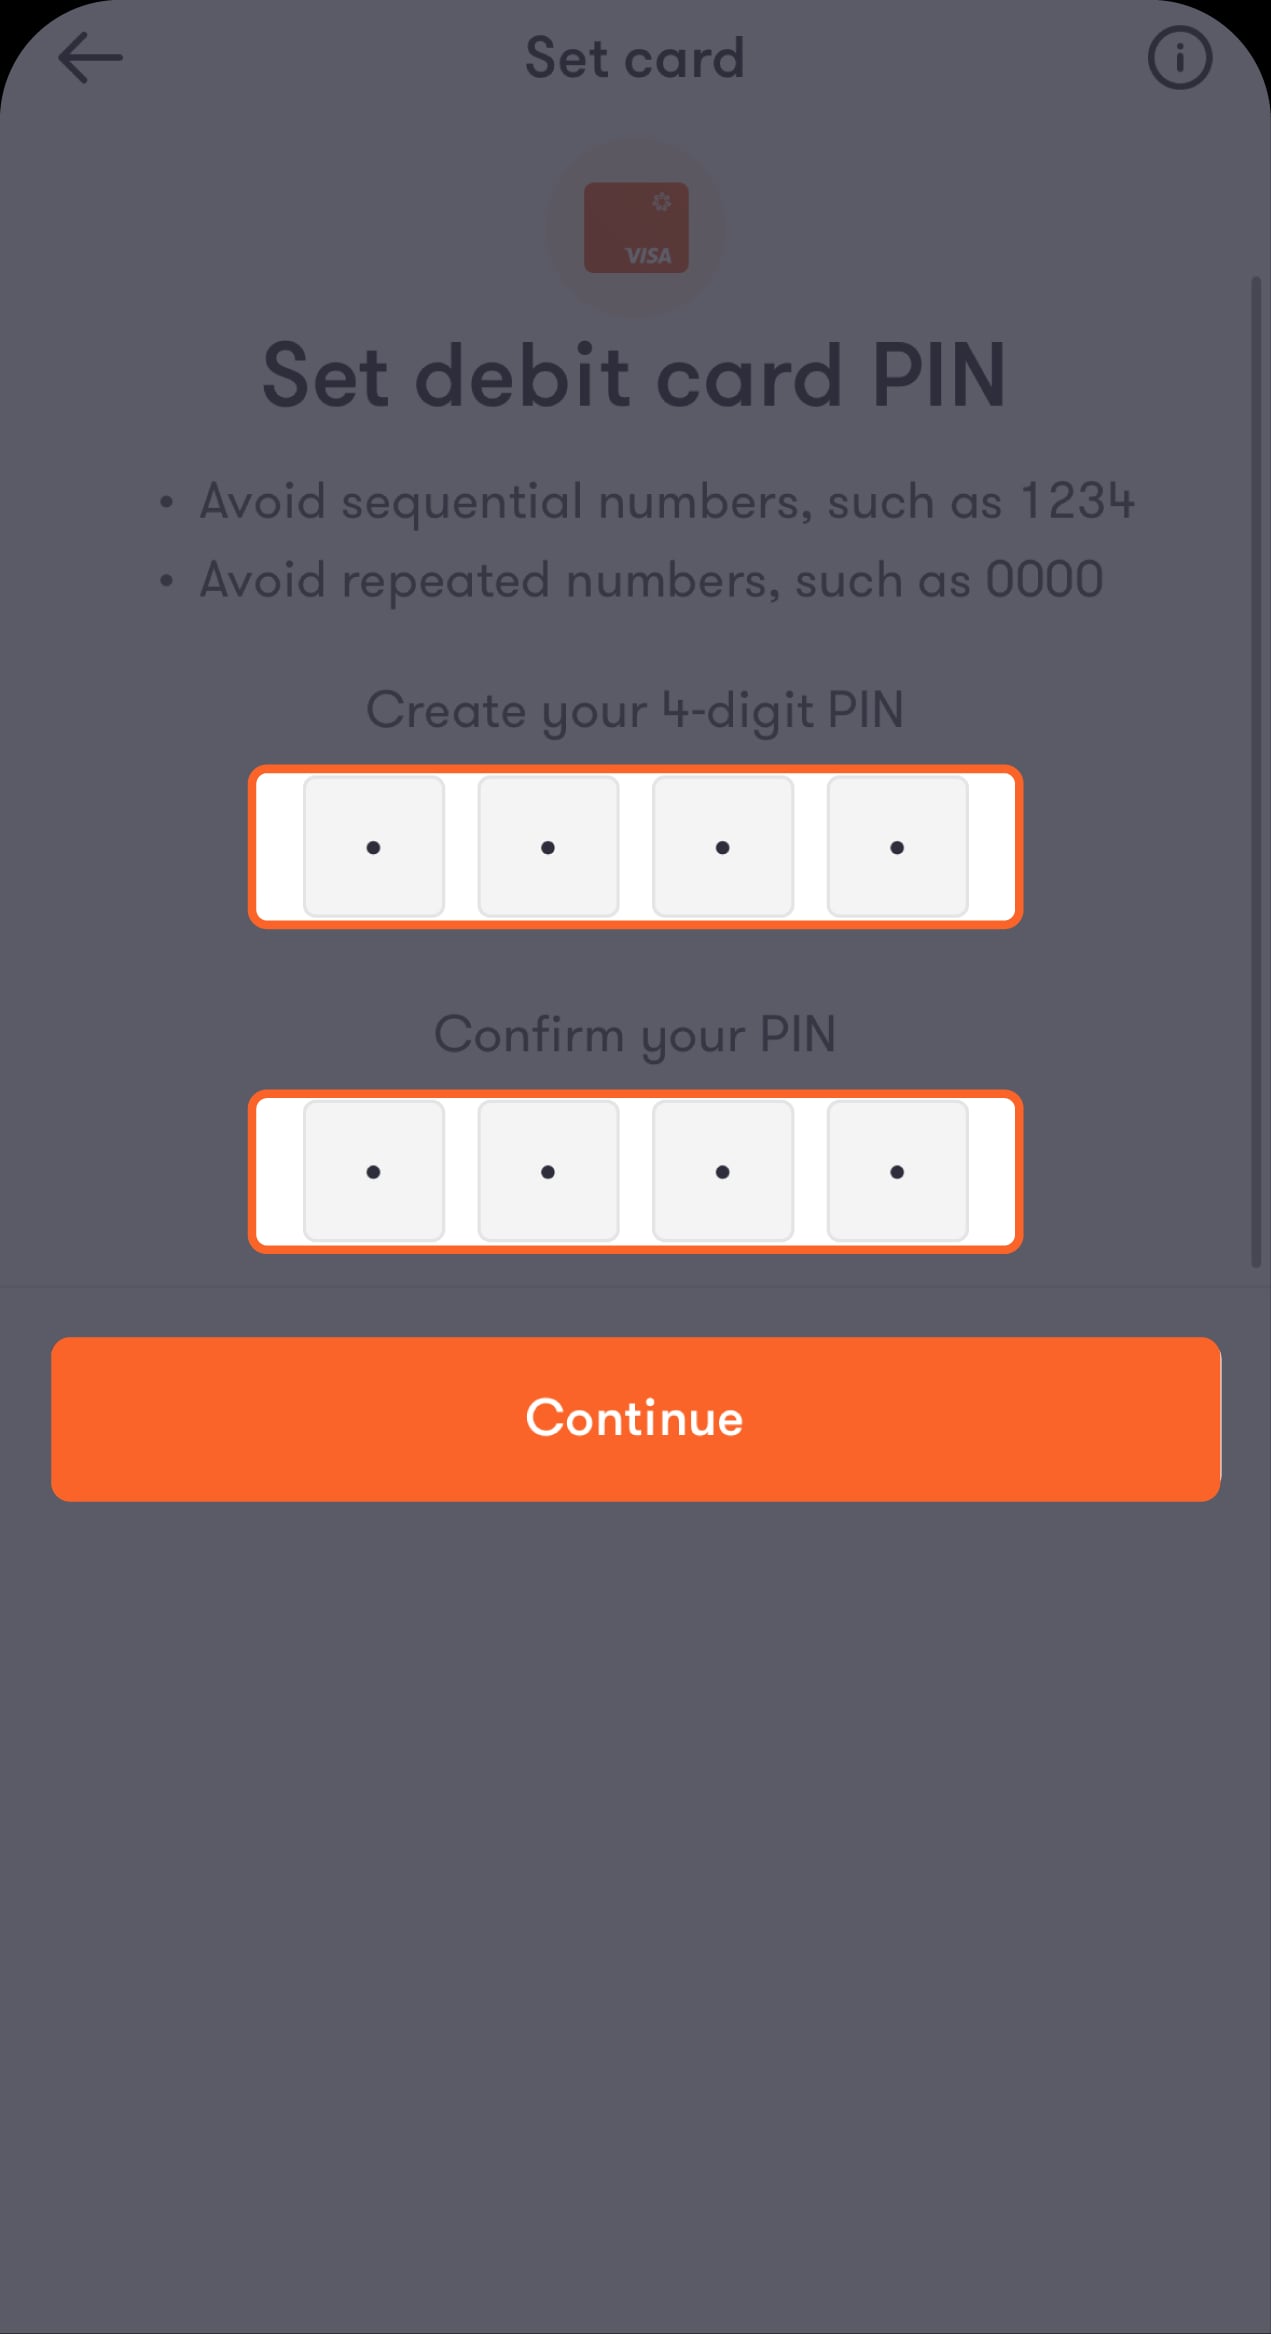
Step 26 of 28
Set and confirm your debit card PIN, then tap “Continue”.
You will be directed to choose your card delivery address.
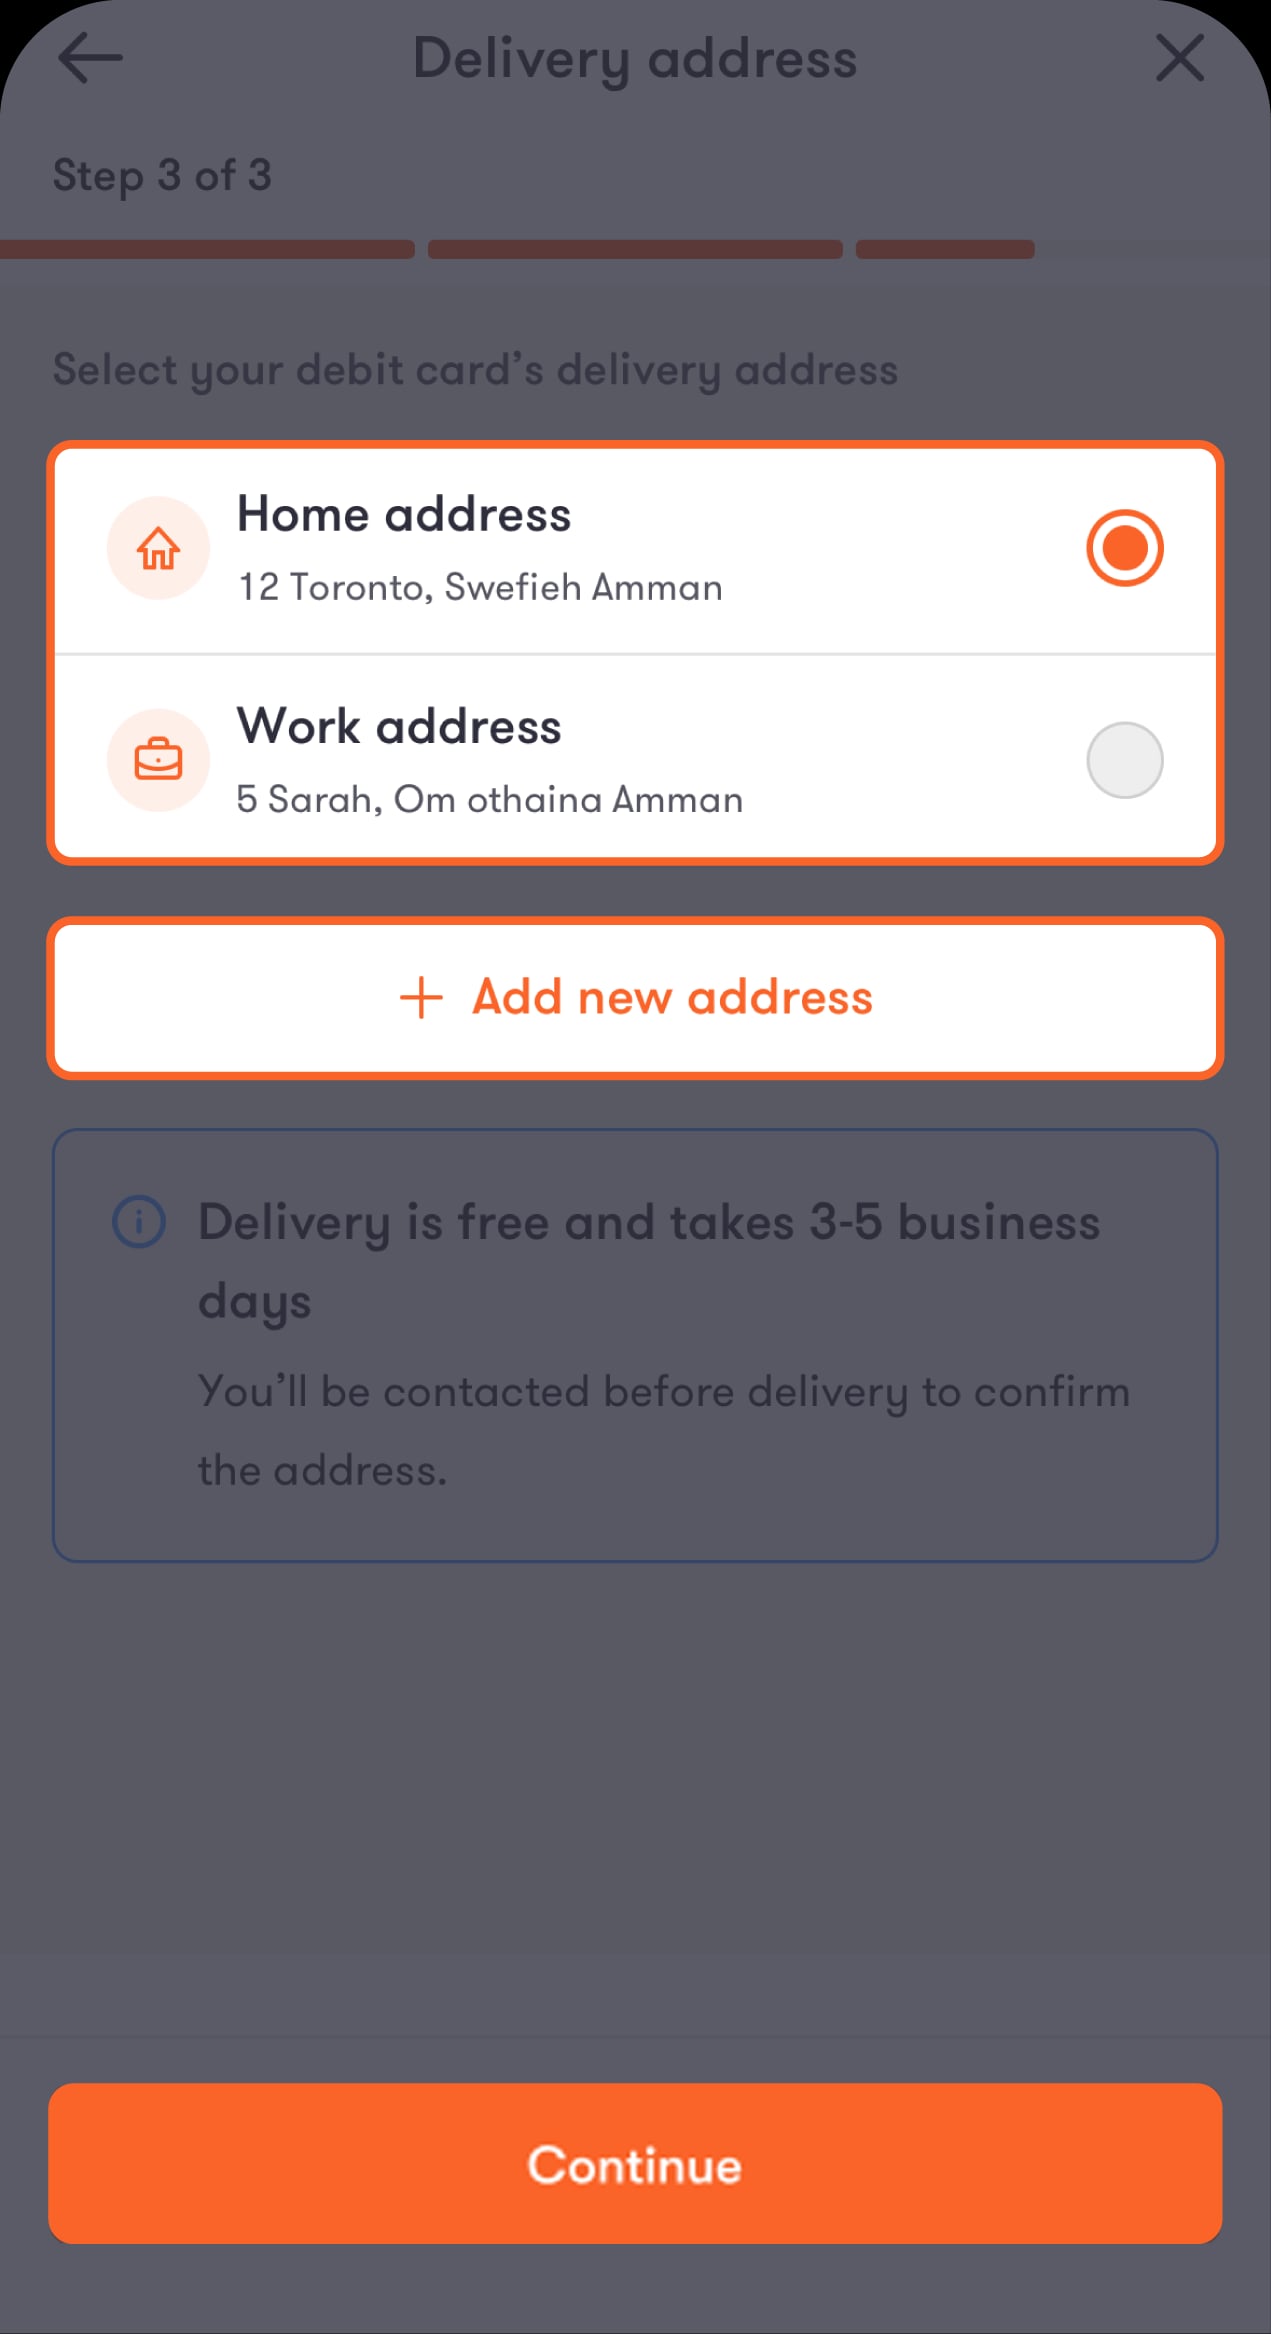
Step 27 of 28
Select your delivery address or add a new one for your debit card delivery
Tap “Continue” to proceed with creating your account.
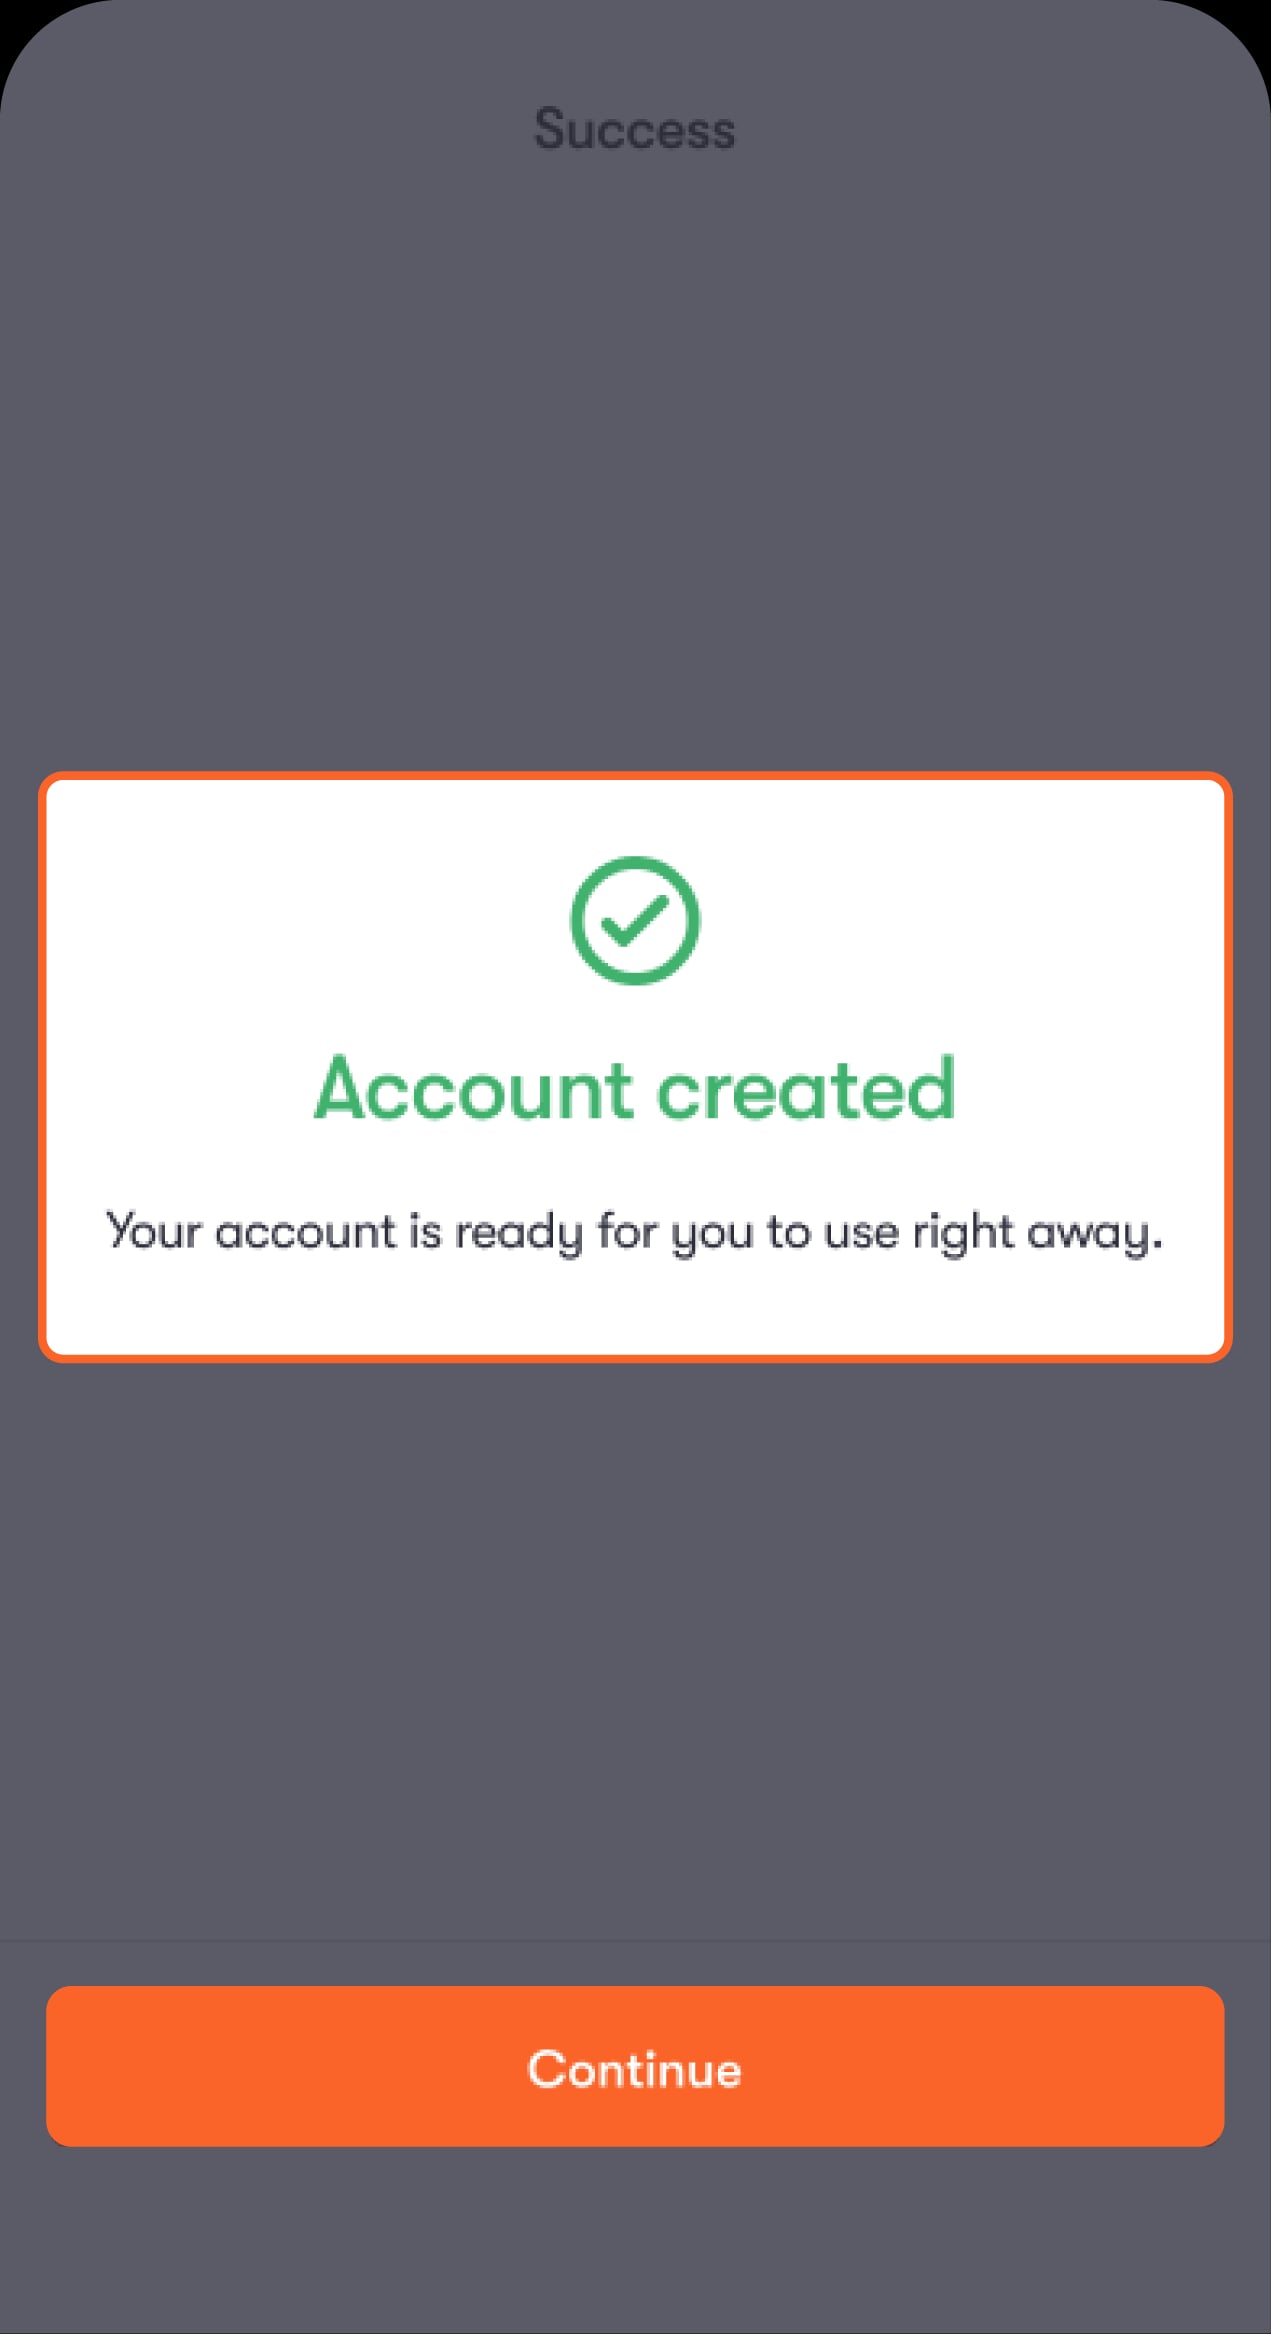
Step 28 of 28
You’re all set!
Your account is ready to use right away.
Read the FAQ’s
How do I activate my account?
What can I do if my ID won’t scan?
Can I use a non-Jordanian phone number?
Was this article helpful?
We’re always looking to improve, and your feedback will help us shape our future content so we can be as useful to you as we possibly can.